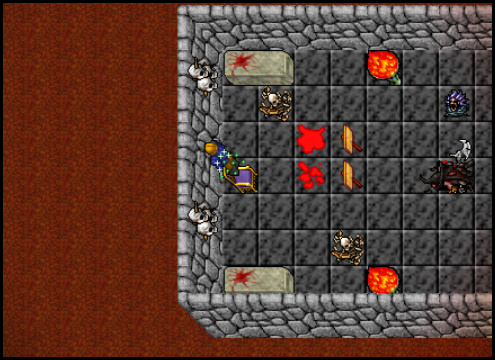
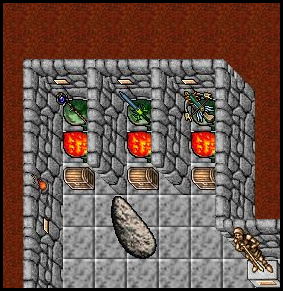
Pits of Inferno Quest: Difference between revisions
No edit summary |
No edit summary |
||
| (65 intermediate revisions by the same user not shown) | |||
| Line 2: | Line 2: | ||
<b>Location:</b> [[Pits of Inferno]].</br> | <b>Location:</b> [[Pits of Inferno]].</br> | ||
<b>Required level</b>: 80.</br> | <b>Required level</b>: 80.</br> | ||
<b>Reward:</b> 10,000 [[Gold Coin]]s, [[Pair of Soft Boots]], [[Backpack of Holding]], [[Stuffed Dragon]], [[Frozen Starlight]], [[Ultimate Healing Rune]] x10 | <b>Reward:</b> <span style="color: white;">Optional:</span> [[Ironspitter]], [[Arcane Staff]] or [[The Slayer of Evil]].</br> 10,000 [[Gold Coin]]s, [[Pair of Soft Boots]], [[Backpack of Holding]], [[Stuffed Dragon]], [[Frozen Starlight]], x10 [[Ultimate Healing Rune]], x10 [[Sudden Death Rune]], x30 [[Explosion Rune]], x50 [[Heavy Magic Missile Rune]].</br>Ability to use a shortcut to [[Pits of Inferno]], located on the 1st floor of the necromancer's house on the [[Plains of Havoc]].</br> | ||
<b>Monsters:</b> [[Phantasm]], [[Destroyer]], [[Lost Soul]], [[Blightwalker]], [[Plaguesmith]], [[Nightmare]], [[Juggernaut]], [[Diabolic Imp]], [[Fury]], [[Hellfire Fighter]], [[Dragon Lord]], [[Spectre]], [[Hand of Cursed Fate]], [[Dark Torturer]], [[Hellhound]], [[Defiler]], and [[Betrayed Wraith]]. | <b>Monsters:</b> [[Phantasm]]s, [[Destroyer]]s, [[Lost Soul]]s, [[Blightwalker]]s, [[Plaguesmith]]s, [[Nightmare]]s, [[Juggernaut]]s, [[Diabolic Imp]]s, [[Fury]]s, [[Hellfire Fighter]]s, [[Dragon Lord]]s, [[Spectre]]s, [[Hand of Cursed Fate]]s, [[Dark Torturer]]s, [[Hellhound]]s, [[Defiler]]s, and [[Betrayed Wraith]]s. | ||
| Line 13: | Line 13: | ||
[[File:Vial of Blood.png]] [[Vial of Blood]]</br> | [[File:Vial of Blood.png]] [[Vial of Blood]]</br> | ||
[[File:Vial of Oil.png]] [[Vial of Oil]]</br> | [[File:Vial of Oil.png]] [[Vial of Oil]]</br> | ||
[[File:Crystal Key.png]] [[Key 3700]] | [[File:Crystal Key.png]] [[Key 3700]] (can be found in a cave south of [[Venore]])</br> | ||
[[File:Holy Tible.png]] [ | [[File:The Holy Tible.png]] [//wiki.realesta74.net/The_Holy_Tible Holy Tible] (can be found in a chest, east of <b>Knightwatch Tower</b>) | ||
[[Plains of Havoc]] to be able to take the book from the chest again for a fee of 1,000 gp.</br> | *If we've taken the book before, we need to go to [[Oldrak]], which is located in a temple on the | ||
*[[Plains of Havoc]] to be able to take the book from the chest again for a fee of 1,000 gp.</br> | |||
---- | ---- | ||
<span style="font-size: | <span style="font-size:180%;"><b>Description:</b></span></br> | ||
<span style="font-size: | <span style="font-size:150%;"><b>Closed passage</b></span> | ||
[[File:Pits of Inferno-Dom.png]] [[File:Pits of Inferno-Tunnel.png]] | [[File:Pits of Inferno-Dom.png]] [[File:Pits of Inferno-Tunnel.png]] | ||
*Head to the underground of the necromancer's house in the [[Plains of Havoc]], then go to the small room in the east of the tunnels, where you use a [[Pick]]. | *Head to the underground of the necromancer's house in the [[Plains of Havoc]], then go to the small room in the east of the tunnels, where you use a [[Pick]]. | ||
| Line 28: | Line 29: | ||
*To move on, spill [[Vial of Blood]] on the grave of the necromancer Goshnar. You will be teleported to the room below. | *To move on, spill [[Vial of Blood]] on the grave of the necromancer Goshnar. You will be teleported to the room below. | ||
[[File:Pits of Inferno- | [[File:Pits of Inferno-Goshnar2.png]] | ||
*As you enter the magic field, you will be taken to the other side of the magic wall. To pass, you must have a PACC, and a [[Holy Tible]] in your backpack. Then head east past the level gate and go down. | *As you enter the magic field, you will be taken to the other side of the magic wall. To pass, you must have a PACC, and a [[Holy Tible]] in your backpack. Then head east past the level gate and go down. | ||
----- | ----- | ||
<span style="font-size: | |||
<span style="font-size:150%;"><b>Road to Hell</b></span></br> | |||
*Going further you will find a closed bridge, unfortunately the lever is old and rusty, so you will have to use [[Vial of Oil]]. | *Going further you will find a closed bridge, unfortunately the lever is old and rusty, so you will have to use [[Vial of Oil]]. | ||
[[File:Pits of Inferno- | [[File:Pits of Inferno-LeverOil2.png]] | ||
| Line 51: | Line 49: | ||
*You will find yourself in a room with 4 paths: | *You will find yourself in a room with 4 paths: | ||
[[File:PitsofInferno- | [[File:PitsofInferno-4Wayss.png]] | ||
*Here, each of the four professions must pass a test to unlock the path to the [[Pits of Inferno]]. | *Here, each of the four professions must pass a test to unlock the path to the [[Pits of Inferno]]. | ||
| Line 74: | Line 72: | ||
*Once all the walls of fire have been removed, you can continue your expedition. You have holes in front of you that lead to the lever cave, and a teleport that will take you in front of the walls of fire. | *Once all the walls of fire have been removed, you can continue your expedition. You have holes in front of you that lead to the lever cave, and a teleport that will take you in front of the walls of fire. | ||
*There is also a quest door on the left side of the room, which we will be able to pass through after completing the next item with levers, the tunnel behind the door leads behind the stones to the blightwalkers. | *There is also a quest door on the left side of the room, which we will be able to pass through after completing the next item with levers, the tunnel behind the door leads behind the stones to the blightwalkers. | ||
*Now, you need to remove the two boulders blocking access to the ladder east of the cave entrance. Unfortunately, the task is not easy, as each lever is guarded by hordes of monsters | *Now, you need to remove the two boulders blocking access to the ladder east of the cave entrance. Unfortunately, the task is not easy, as each lever is guarded by hordes of monsters. | ||
*Now you have to switch <span style="color: red;">15 levers (you can switch them in any order).</span> | |||
*<span style="color: red;">When you switch the lever that opens the stones after 15 minutes, all the levers reset. So you have 15 minutes to go behind the stones !!!</span> | |||
[[File: | [[File:poia44.png|800px]] [[File:poia444.png|800px]] | ||
*When you get to the place behind the boulders, you will find a teleport leading to the exit from the underground, and a ladder leading to the next part of the task. | *When you get to the place behind the boulders, you will find a teleport leading to the exit from the underground, and a ladder leading to the next part of the task. | ||
| Line 89: | Line 83: | ||
*Divide the team into two parts, one will stay in this room, the other will head north. | *Divide the team into two parts, one will stay in this room, the other will head north. | ||
[[File:PitsofInferno- | [[File:PitsofInferno-DTcity2.png]] | ||
*First switch the levers on the left (the stalagmite blocking the second lever will disappear), and then the lever on the right. When you do this you will be able to continue north to the hole, as a bridge will appear in front of the hole. | *First switch the levers on the left (the stalagmite blocking the second lever will disappear), and then the lever on the right. When you do this you will be able to continue north to the hole, as a bridge will appear in front of the hole. | ||
| Line 98: | Line 92: | ||
*In front of you is a maze with invisible teleports: | *In front of you is a maze with invisible teleports: | ||
[[File:Poi | [[File:Poi 5bbb.png]] | ||
<span style="font-size:140%;"><b>Legend:</b></span></br> | <span style="font-size:140%;"><b>Legend:</b></span></br> | ||
| Line 105: | Line 99: | ||
*Use the [[pick]] here and go downstairs. You need to switch the lever that is located in the eastern part of the room to remove the boulder blocking access to the ladder, when you get to the top head west. | *Use the [[pick]] here and go downstairs. You need to switch the lever that is located in the eastern part of the room to remove the boulder blocking access to the ladder, when you get to the top head west. | ||
*Now you have a choice whether you want to continue your journey or return home. The hole in the north leads to the [[Plains of Havoc]]. South level gate. | *Now you have a choice whether you want to continue your journey or return home. The hole in the north leads to the [[Plains of Havoc]]. South level gate. | ||
---- | ---- | ||
<span style="font-size:140%;"><b>Level gate</b></span></br> | <span style="font-size:140%;"><b>Level gate</b></span></br> | ||
| Line 123: | Line 106: | ||
*Going north, you will end up in a room with teleports to the throne chambers of The Ruthless Seven | *Going north, you will end up in a room with teleports to the throne chambers of The Ruthless Seven | ||
[[File:Poi | [[File:Poi thrones2.png]] | ||
*To pass each room you must enter each throne twice. | *To pass each room you must enter each throne twice. | ||
<span style="font-size: | <span style="font-size:180%;"><b>Ruthless Seven throne chambers</b></span></br> | ||
<span style="font-size: | <span style="font-size:150%;"><b>Apocalypse throne room:</b></span> | ||
{| class="wikitable sortable" style="text-align:center; vertical-align:middle; background-color:#4C4C4C; color:#C1C1C1;" | {| class="wikitable sortable" style="text-align:center; vertical-align:middle; background-color:#4C4C4C; color:#C1C1C1;" | ||
| Line 135: | Line 118: | ||
! Name | ! Name | ||
! | ! | ||
! Hitpoints | |||
! Experience | ! Experience | ||
|- | |- | ||
| [[Destroyer]] | | [[Destroyer]] | ||
| [[File:Destroyer.gif]] | | [[File:Destroyer.gif]] | ||
| 3,700 | |||
| 2,500 | | 2,500 | ||
|- | |- | ||
| [[Fury]] | | [[Fury]] | ||
| [[File:Fury.gif]] | | [[File:Fury.gif]] | ||
| 4,100 | | 4,100 | ||
| 4,500 | |||
|- | |- | ||
| [[Demon]] | | [[Demon]] | ||
| [[File:Demon.gif]] | | [[File:Demon.gif]] | ||
| 8,200 | |||
| 6,000 | | 6,000 | ||
|- | |- | ||
| [[Juggernaut]] | | [[Juggernaut]] | ||
| [[File:Juggernaut.gif]] | | [[File:Juggernaut.gif]] | ||
| 20,000 | |||
| 20,000 | | 14,000 | ||
|- | |- | ||
|} | |} | ||
[[File: | [[File:Poi_888.png]] | ||
Apocalypse Throne Room. | <i>Apocalypse Throne Room.</i> | ||
---- | ---- | ||
<span style="font-size: | |||
<span style="font-size:150%;"><b>Ashphalor's throne room:</b></span> | |||
{| class="wikitable sortable" style="text-align:center; vertical-align:middle; background-color:#4C4C4C; color:#C1C1C1;" | {| class="wikitable sortable" style="text-align:center; vertical-align:middle; background-color:#4C4C4C; color:#C1C1C1;" | ||
| Line 176: | Line 155: | ||
! Name | ! Name | ||
! | ! | ||
! Hitpoints | |||
! Experience | ! Experience | ||
|- | |- | ||
| [[Lich]] | | [[Lich]] | ||
| [[File:Lich.gif]] | | [[File:Lich.gif]] | ||
| 880 | |||
| 900 | | 900 | ||
|- | |- | ||
| [[Demon]] | | [[Demon]] | ||
| [[File:Demon.gif]] | | [[File:Demon.gif]] | ||
| 8,200 | | 8,200 | ||
| | | 6,000 | ||
|- | |- | ||
| [[Undead Dragon]] | | [[Undead Dragon]] | ||
| [[File:Undead Dragon.gif]] | | [[File:Undead Dragon.gif]] | ||
| 8,350 | | 8,350 | ||
| | | 7,200 | ||
|- | |- | ||
|} | |} | ||
[[File: | [[File:Poi_99.png]] | ||
Ashfalor's throne room. | <i>Ashfalor's throne room.</i> | ||
---- | ---- | ||
<span style="font-size: | |||
<span style="font-size:150%;"><b>Bazir's throne room:</b></span> | |||
{| class="wikitable sortable" style="text-align:center; vertical-align:middle; background-color:#4C4C4C; color:#C1C1C1;" | {| class="wikitable sortable" style="text-align:center; vertical-align:middle; background-color:#4C4C4C; color:#C1C1C1;" | ||
| Line 211: | Line 187: | ||
! Name | ! Name | ||
! | ! | ||
! Hitpoints | |||
! Experience | ! Experience | ||
|- | |- | ||
| [[Nightmare]] | | [[Nightmare]] | ||
| [[File: | | [[File:Nightmare.gif]] | ||
| 2,700 | | 2,700 | ||
| | | 2,150 | ||
|- | |- | ||
| [[Phantasm]] | | [[Phantasm]] | ||
| [[File:Phantasm.gif]] | | [[File:Phantasm.gif]] | ||
| 3,950 | | 3,950 | ||
| | | 3,300 | ||
|- | |- | ||
| [[Demon]] | | [[Demon]] | ||
| [[File:Demon.gif]] | | [[File:Demon.gif]] | ||
| 8,200 | |||
| 6,000 | | 6,000 | ||
|- | |- | ||
|} | |} | ||
*To get to the chamber with the throne you will have to go through a maze: | *To get to the chamber with the throne you will have to go through a maze: | ||
[[File:poia1.png]] | [[File:poia1.png|400px]] [[File:poia2.png|400px]] [[File:poia3.png|400px]] | ||
[[File:poia2.png]] | |||
[[File:poia3.png]] | |||
<span style="font-size:140%;"><b>Legend:</b></span></br> | <span style="font-size:140%;"><b>Legend:</b></span></br> | ||
| Line 250: | Line 217: | ||
[[File:Poi_13.png]] | [[File:Poi_13.png]] | ||
Bazir's throne room. | <i>Bazir's throne room.</i> | ||
*After passing the room, step onto the carpet in front of the left statue to leave the room. | *After passing the room, step onto the carpet in front of the left statue to leave the room. | ||
---- | ---- | ||
<span style="font-size: | |||
<span style="font-size:150%;"><b>Infernatil's throne room:</b></span> | |||
{| class="wikitable sortable" style="text-align:center; vertical-align:middle; background-color:#4C4C4C; color:#C1C1C1;" | {| class="wikitable sortable" style="text-align:center; vertical-align:middle; background-color:#4C4C4C; color:#C1C1C1;" | ||
| Line 260: | Line 228: | ||
! Name | ! Name | ||
! | ! | ||
! Hitpoints | |||
! Experience | ! Experience | ||
|- | |- | ||
| [[Hellfire Fighter]] | | [[Hellfire Fighter]] | ||
| [[File:Hellfire Fighter.gif]] | | [[File:Hellfire Fighter.gif]] | ||
| 3,800 | |||
| 3,900 | | 3,900 | ||
|- | |- | ||
| [[Hellhound]] | | [[Hellhound]] | ||
| [[File:Hellhound.gif]] | | [[File:Hellhound.gif]] | ||
| 7,500 | |||
| 6,800 | | 6,800 | ||
|- | |- | ||
| [[Demon]] | | [[Demon]] | ||
| [[File:Demon.gif]] | | [[File:Demon.gif]] | ||
| 8,200 | | 8,200 | ||
| | | 6,000 | ||
|- | |- | ||
|} | |} | ||
[[File: | [[File:Poi_144.png]] | ||
Infernatil's throne room. | <i>Infernatil's throne room.</i> | ||
---- | ---- | ||
<span style="font-size: | |||
<span style="font-size:150%;"><b>Pumin's throne room:</b></span> | |||
{| class="wikitable sortable" style="text-align:center; vertical-align:middle; background-color:#4C4C4C; color:#C1C1C1;" | {| class="wikitable sortable" style="text-align:center; vertical-align:middle; background-color:#4C4C4C; color:#C1C1C1;" | ||
| Line 295: | Line 260: | ||
! Name | ! Name | ||
! | ! | ||
! Hitpoints | |||
! Experience | ! Experience | ||
|- | |- | ||
| [[Spectre]] | | [[Spectre]] | ||
| [[File:Spectre.gif]] | | [[File:Spectre.gif]] | ||
| | | 1,350 | ||
| 1,350 | | 1,350 | ||
|- | |- | ||
| [[Betrayed Wraith]] | | [[Betrayed Wraith]] | ||
| [[File:Betrayed Wraith.gif]] | | [[File:Betrayed Wraith.gif]] | ||
| 4,200 | | 4,200 | ||
| | | 3,500 | ||
|- | |- | ||
| [[Demon]] | | [[Demon]] | ||
| [[File:Demon.gif]] | | [[File:Demon.gif]] | ||
| | | 8,200 | ||
| 6,000 | |||
| | |||
|- | |- | ||
| [[Hand of Cursed Fate]] | | [[Hand of Cursed Fate]] | ||
| [[File:Hand of Cursed Fate.gif]] | | [[File:Hand of Cursed Fate.gif]] | ||
| 7,500 | |||
| 5,000 | | 5,000 | ||
|- | |- | ||
|} | |} | ||
| Line 343: | Line 303: | ||
*and we can enter the teleport further. | *and we can enter the teleport further. | ||
[[File:Poi 15. | [[File:Poi 15.png]] | ||
Pumin's throne room. | <i>Pumin's throne room.</i> | ||
---- | ---- | ||
<span style="font-size: | |||
<span style="font-size:150%;"><b>Verminor's throne room:</b></span> | |||
{| class="wikitable sortable" style="text-align:center; vertical-align:middle; background-color:#4C4C4C; color:#C1C1C1;" | {| class="wikitable sortable" style="text-align:center; vertical-align:middle; background-color:#4C4C4C; color:#C1C1C1;" | ||
| Line 354: | Line 315: | ||
! Name | ! Name | ||
! | ! | ||
! Hitpoints | |||
! Experience | ! Experience | ||
|- | |- | ||
| [[Defiler]] | | [[Defiler]] | ||
| [[File:Defiler.gif]] | | [[File:Defiler.gif]] | ||
| 3,650 | |||
| 3,700 | | 3,700 | ||
|- | |- | ||
| [[Plaguesmith]] | | [[Plaguesmith]] | ||
| [[File:Plaguesmith.gif]] | | [[File:Plaguesmith.gif]] | ||
| 8,250 | | 8,250 | ||
| | | 4,500 | ||
|- | |- | ||
| [[Son of Verminor]] | | [[Son of Verminor]] | ||
| [[File:Slime.gif]] | | [[File:Slime.gif]] | ||
| 8,500 | | 8,500 | ||
| | | 5,900 | ||
|- | |- | ||
| [[Blightwalker]] | | [[Blightwalker]] | ||
| [[File:Blightwalker.gif]] | | [[File:Blightwalker.gif]] | ||
| 8,900 | |||
| 5,850 | | 5,850 | ||
|- | |- | ||
|} | |} | ||
[[File:Poi 16. | [[File:Poi 16.png]] | ||
Verminor's throne room. | <i>Verminor's throne room.</i> | ||
---- | ---- | ||
<span style="font-size: | |||
<span style="font-size:150%;"><b>Tafariel's throne room:</b></span> | |||
{| class="wikitable sortable" style="text-align:center; vertical-align:middle; background-color:#4C4C4C; color:#C1C1C1;" | {| class="wikitable sortable" style="text-align:center; vertical-align:middle; background-color:#4C4C4C; color:#C1C1C1;" | ||
| Line 395: | Line 352: | ||
! Name | ! Name | ||
! | ! | ||
! Hitpoints | |||
! Experience | ! Experience | ||
|- | |- | ||
| [[Banshee]] | | [[Banshee]] | ||
| [[File:Banshee.gif]] | | [[File:Banshee.gif]] | ||
| 1,000 | |||
| 900 | | 900 | ||
|- | |- | ||
| [[Dark Torturer]] | | [[Dark Torturer]] | ||
| [[File:Dark Torturer.gif]] | | [[File:Dark Torturer.gif]] | ||
| 7,350 | | 7,350 | ||
| | | 4,650 | ||
|- | |- | ||
| [[Demon]] | | [[Demon]] | ||
| [[File:Demon.gif]] | | [[File:Demon.gif]] | ||
| 8,200 | |||
| 6,000 | | 6,000 | ||
|- | |- | ||
| [[Lost Soul]] | | [[Lost Soul]] | ||
| [[File:Lost Soul.gif]] | | [[File:Lost Soul.gif]] | ||
| 5,800 | | 5,800 | ||
| | | 4,000 | ||
|- | |- | ||
|} | |} | ||
[[File:Poi 17. | [[File:Poi 17.png]] | ||
Tafariel's throne room. | <i>Tafariel's throne room.</i> | ||
---- | ---- | ||
<span style="font-size:120%;"><b>Completion</b></span> | <span style="font-size:120%;"><b>Completion</b></span> | ||
| Line 434: | Line 387: | ||
<span style="font-size: | <span style="font-size:150%;"><b>Final Room</b></span> | ||
[[File:Poi_18. | [[File:Poi_18.png]] | ||
[[Category: Quests]] | [[Category: Quests]] | ||
Latest revision as of 15:07, 30 January 2025
Name: Pits of Inferno Quest (POI).
Location: Pits of Inferno.
Required level: 80.
Reward: Optional: Ironspitter, Arcane Staff or The Slayer of Evil.
10,000 Gold Coins, Pair of Soft Boots, Backpack of Holding, Stuffed Dragon, Frozen Starlight, x10 Ultimate Healing Rune, x10 Sudden Death Rune, x30 Explosion Rune, x50 Heavy Magic Missile Rune.
Ability to use a shortcut to Pits of Inferno, located on the 1st floor of the necromancer's house on the Plains of Havoc.
Monsters: Phantasms, Destroyers, Lost Souls, Blightwalkers, Plaguesmiths, Nightmares, Juggernauts, Diabolic Imps, Furys, Hellfire Fighters, Dragon Lords, Spectres, Hand of Cursed Fates, Dark Torturers, Hellhounds, Defilers, and Betrayed Wraiths.
Spoiler:
Required items:
![]() Shovel or replacement
Shovel or replacement
![]() Rope or substitute
Rope or substitute
![]() Pick or substitute
Pick or substitute
![]() Vial of Blood
Vial of Blood
![]() Vial of Oil
Vial of Oil
![]() Key 3700 (can be found in a cave south of Venore)
Key 3700 (can be found in a cave south of Venore)
![]() Holy Tible (can be found in a chest, east of Knightwatch Tower)
Holy Tible (can be found in a chest, east of Knightwatch Tower)
- If we've taken the book before, we need to go to Oldrak, which is located in a temple on the
- Plains of Havoc to be able to take the book from the chest again for a fee of 1,000 gp.
Description:
Closed passage
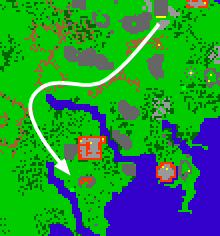
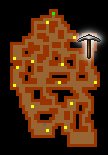
- Head to the underground of the necromancer's house in the Plains of Havoc, then go to the small room in the east of the tunnels, where you use a Pick.
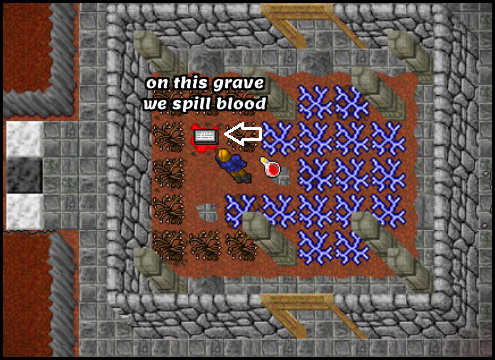
- To move on, spill Vial of Blood on the grave of the necromancer Goshnar. You will be teleported to the room below.
- As you enter the magic field, you will be taken to the other side of the magic wall. To pass, you must have a PACC, and a Holy Tible in your backpack. Then head east past the level gate and go down.
Road to Hell
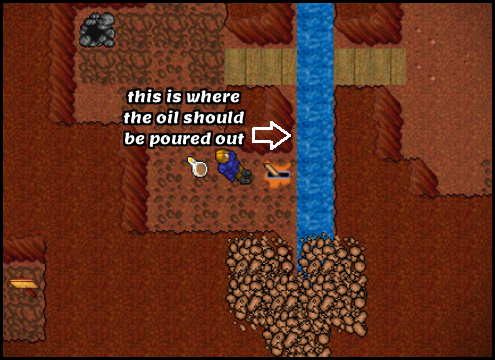
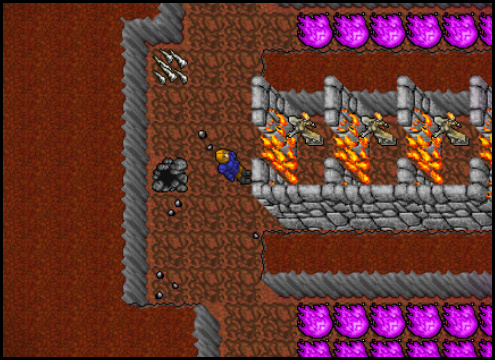
- Going further you will find a closed bridge, unfortunately the lever is old and rusty, so you will have to use Vial of Oil.
- Now head to the northern hole to the right of the bridge. Below you will find a cave with a large number of Dragon Lords who will defend their territory. In this case, in order to complete the task, we will have to fight them. Head to the place where you can climb the rope, in the east of the cave.
- You will find yourself in a room with 4 paths:
- Here, each of the four professions must pass a test to unlock the path to the Pits of Inferno.
- Each of the four ways is for a particular profession. Stepping On If we take the wrong path, a warning will appear. If we take the wrong path to the end, it will end in death, as the final flame takes the wrong profession's entire life.
Knight - north
Druid - northeastern
Paladin - southeastern
Sorcerer - south
Note: Each step along the flames causes a loss of 300 HP.
- At the end of the path there is a place where you should use a rope. Above it is a room with 3 monsters:
Knight - 2 Diabolic Imp and 1 Spectre
Druid - 1 Spectre, 1 Diabolic Imp and 1 Nightmare
Paladin - 1 Spectre and 2 Nightmare
Sorcerer - 1 Spectre and 2 Nightmare
- In addition, in each room there is a lever that must be toggled to make the walls of fire, which block the way forward, disappear.
- Once all the walls of fire have been removed, you can continue your expedition. You have holes in front of you that lead to the lever cave, and a teleport that will take you in front of the walls of fire.
- There is also a quest door on the left side of the room, which we will be able to pass through after completing the next item with levers, the tunnel behind the door leads behind the stones to the blightwalkers.
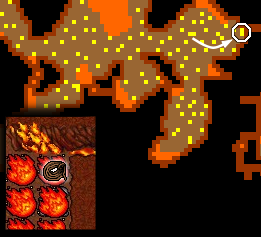
- Now, you need to remove the two boulders blocking access to the ladder east of the cave entrance. Unfortunately, the task is not easy, as each lever is guarded by hordes of monsters.
- Now you have to switch 15 levers (you can switch them in any order).
- When you switch the lever that opens the stones after 15 minutes, all the levers reset. So you have 15 minutes to go behind the stones !!!
- When you get to the place behind the boulders, you will find a teleport leading to the exit from the underground, and a ladder leading to the next part of the task.
- After climbing the ladder to the next room, you will find a room with several Blightwalkers and another 15 levers and a riddle book.
- You don't need to move any levers here because they are all useless.
- Divide the team into two parts, one will stay in this room, the other will head north.
- First switch the levers on the left (the stalagmite blocking the second lever will disappear), and then the lever on the right. When you do this you will be able to continue north to the hole, as a bridge will appear in front of the hole.
- When you go lower, advance north, then east until you find a panel that acts as a lever that activates the ladder in the room with 15 levers.
- Now have the second team climb the ladder and knock out the monsters there. Once they are all there the first team can go back to the room with the levers. Unfortunately, the ladder disappears when you step off the tile, so the second team will have to be ditched. Once everyone is in the only place you can go higher using, rope place above going down the ladder.
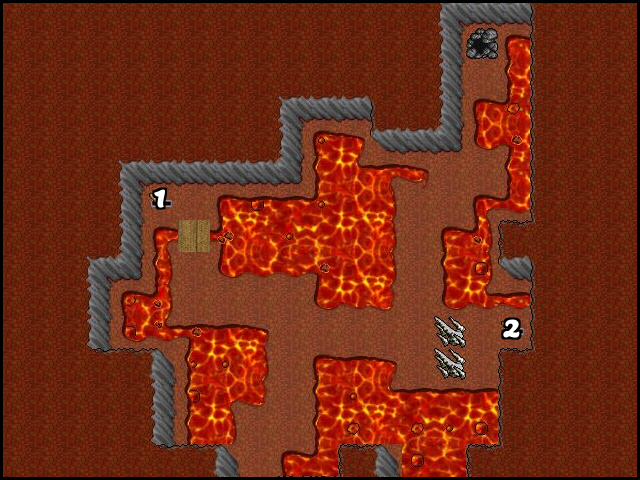
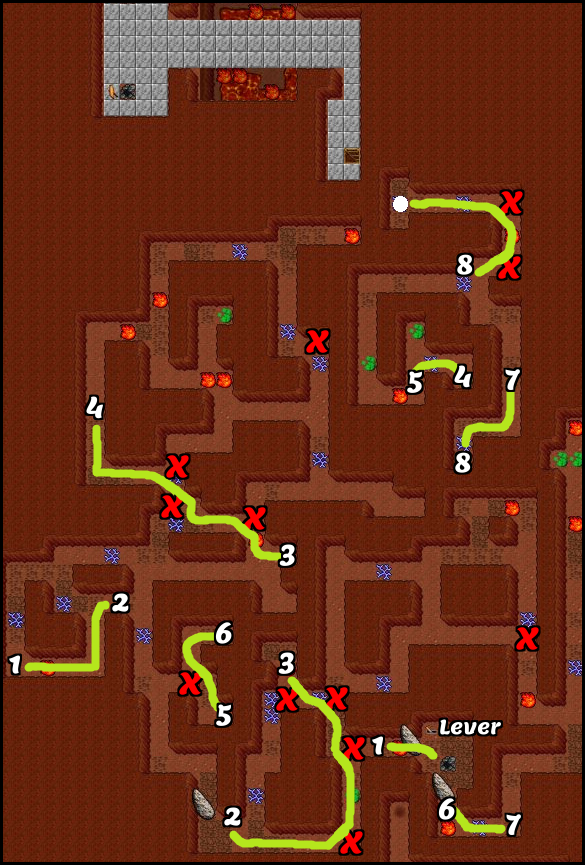
- In front of you is a maze with invisible teleports:
Legend:
X - teleports to avoid
- Use the pick here and go downstairs. You need to switch the lever that is located in the eastern part of the room to remove the boulder blocking access to the ladder, when you get to the top head west.
- Now you have a choice whether you want to continue your journey or return home. The hole in the north leads to the Plains of Havoc. South level gate.
Level gate
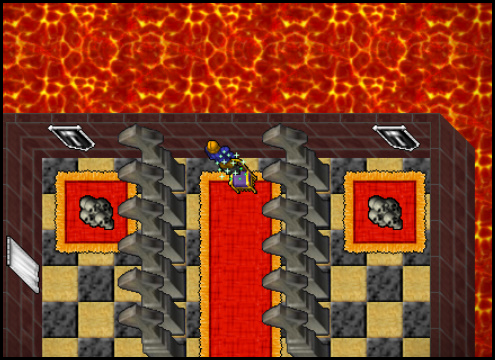
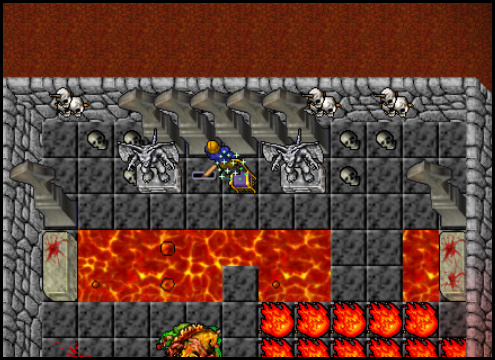
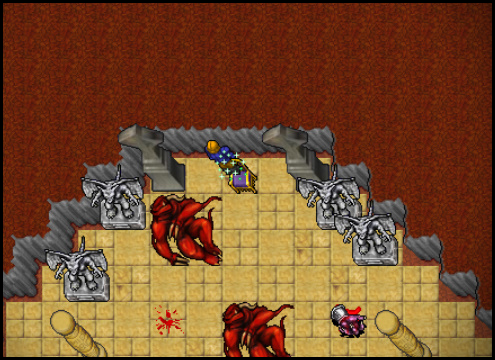
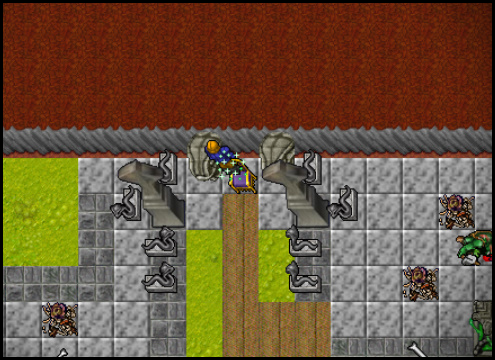
- Going down the ladder head north, at a certain point a stone will appear behind you and you will be teleported to another room. To let the others pass you must switch the lever which is located in the northern part of the room.
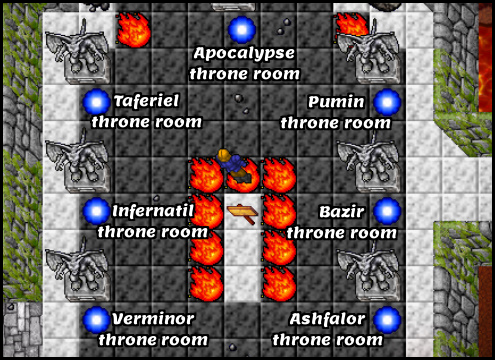
- Going north, you will end up in a room with teleports to the throne chambers of The Ruthless Seven
- To pass each room you must enter each throne twice.
Ruthless Seven throne chambers
Apocalypse throne room:
| Name | Hitpoints | Experience | |
|---|---|---|---|
| Destroyer | 
|
3,700 | 2,500 |
| Fury | 
|
4,100 | 4,500 |
| Demon | 
|
8,200 | 6,000 |
| Juggernaut | 
|
20,000 | 14,000 |
Apocalypse Throne Room.
Ashphalor's throne room:
| Name | Hitpoints | Experience | |
|---|---|---|---|
| Lich | 
|
880 | 900 |
| Demon | 
|
8,200 | 6,000 |
| Undead Dragon | 
|
8,350 | 7,200 |
Ashfalor's throne room.
Bazir's throne room:
| Name | Hitpoints | Experience | |
|---|---|---|---|
| Nightmare | 
|
2,700 | 2,150 |
| Phantasm | 
|
3,950 | 3,300 |
| Demon | 
|
8,200 | 6,000 |
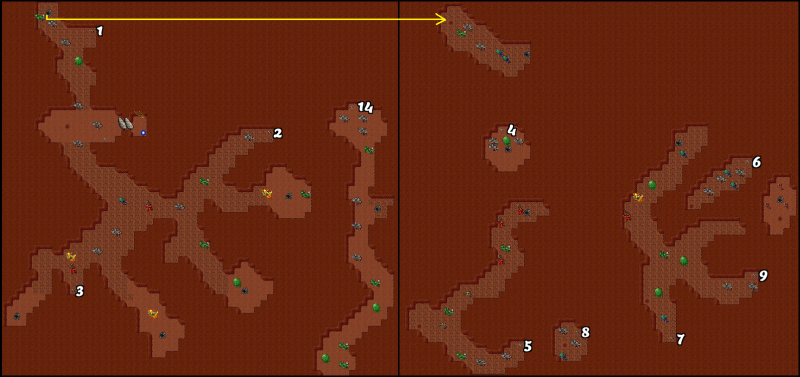
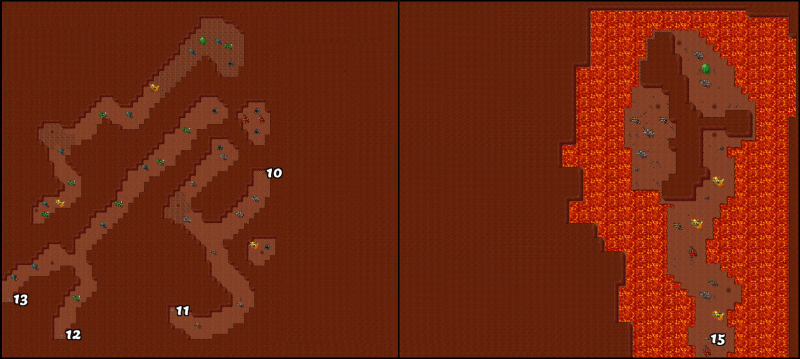
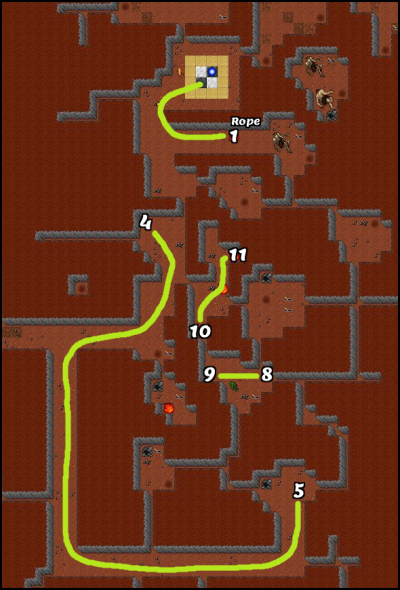
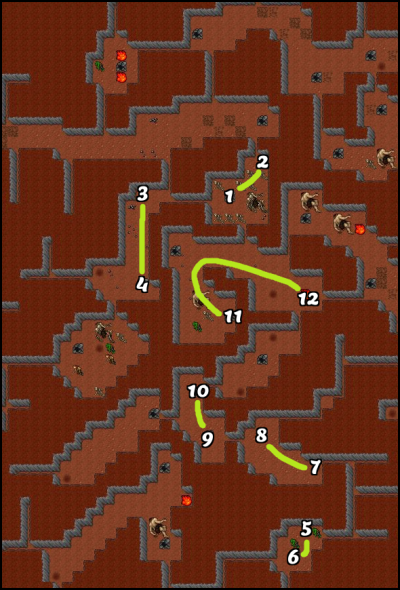
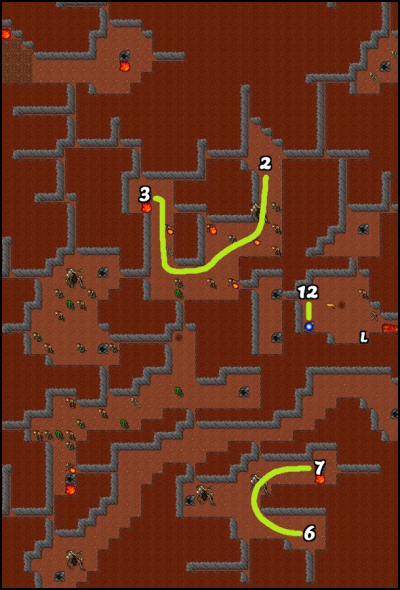
- To get to the chamber with the throne you will have to go through a maze:
Legend:
L - the lever you need to use to make the teleport appear
- After entering the teleport, keep going until you get to the room, with statues, go south to the treasure. You will be teleported to a room where you must reveal the mirror and use it. When you do this you will appear in the throne room.
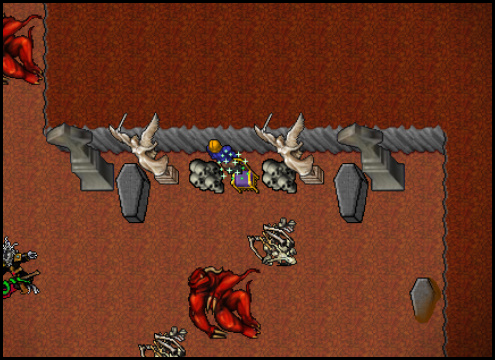
Bazir's throne room.
- After passing the room, step onto the carpet in front of the left statue to leave the room.
Infernatil's throne room:
| Name | Hitpoints | Experience | |
|---|---|---|---|
| Hellfire Fighter | 
|
3,800 | 3,900 |
| Hellhound | 
|
7,500 | 6,800 |
| Demon | 
|
8,200 | 6,000 |
Infernatil's throne room.
Pumin's throne room:
| Name | Hitpoints | Experience | |
|---|---|---|---|
| Spectre | 
|
1,350 | 1,350 |
| Betrayed Wraith | 
|
4,200 | 3,500 |
| Demon | 
|
8,200 | 6,000 |
| Hand of Cursed Fate | 
|
7,500 | 5,000 |
- Before entering the throne room, you will need to obtain permission by getting the appropriate forms.
- Talk to undead NPCs in the proper order:
- A Dead Bureaucrat 1: Hi - Pumin - Your nickname - Your profession - Pumin.
- A Dead Bureaucrat 4: Hi - Pumin - Your nickname - Your profession - 356.
- A Dead Bureaucrat 3: Hi - Pumin - Your nickname - Your profession - 145
- A Dead Bureaucrat 1: Hi - 411 - no
- A Dead Bureaucrat 2: Hi - 287
- A Dead Bureaucrat 1: Hi - 411 - yes
- A Dead Bureaucrat 3: Hi - 145
- A Dead Bureaucrat 4: Hi - 356
- A Dead Bureaucrat 1: Hi - 356.
- After the dialogues are done correctly, the NPC will answer us:
- A Dead Bureaucrat: INCREDIBLE, you did it!!! Have fun at Pumin's domain!
- and we can enter the teleport further.
Pumin's throne room.
Verminor's throne room:
| Name | Hitpoints | Experience | |
|---|---|---|---|
| Defiler | 
|
3,650 | 3,700 |
| Plaguesmith | 
|
8,250 | 4,500 |
| Son of Verminor | 
|
8,500 | 5,900 |
| Blightwalker | 
|
8,900 | 5,850 |
Verminor's throne room.
Tafariel's throne room:
| Name | Hitpoints | Experience | |
|---|---|---|---|
| Banshee | 
|
1,000 | 900 |
| Dark Torturer | 
|
7,350 | 4,650 |
| Demon | 
|
8,200 | 6,000 |
| Lost Soul | 
|
5,800 | 4,000 |
Tafariel's throne room.
Completion
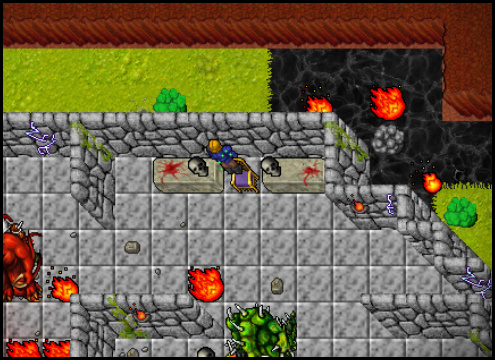
- Once you have successfully completed all the halls go to the north of the room with teleports. Then go through the traps to the door next to which the NPC is standing, to open use the Key 3700. Now head to the teleport and collect the rewards.
Final Room
