Frosty Grandmaster Zilchus Boss: Difference between revisions
From Realesta Wiki
(Created page with "{| class="wikitable" style="text-align:center; background-color:#4C4C4C; color:#E69710;" |- style="font-weight:bold; vertical-align:middle; background-color:#595959; color:#C1C1C1;" ! style="vertical-align:middle;" | NAME ! style="vertical-align:middle;" | Health ! style="vertical-align:middle;" | Experience Reward ! style="vertical-align:middle; width:155px;" | Requirements ! style="vertical-align:middle;" | Items ! style="vertical-align:middle;" | Location |- | sty...") |
m (Text replacement - "Crystaline Sword Quest" to "Crystalline Sword Quest") |
||
| (11 intermediate revisions by the same user not shown) | |||
| Line 1: | Line 1: | ||
{| class="wikitable" style="text-align:center; background-color:#4C4C4C; color:#E69710;" | {| class="wikitable" style="text-align:center; background-color:#4C4C4C; color:#E69710;" | ||
|- style="font-weight:bold; vertical-align:middle; background-color:#595959; color:#C1C1C1;" | |- style="font-weight:bold; vertical-align:middle; background-color:#595959; color:#C1C1C1;" | ||
! style="vertical-align:middle;" | [[ | ! style="vertical-align:middle;" | [[Frosty Grandmaster Zilchus]] | ||
! style="vertical-align:middle;" | Health | ! style="vertical-align:middle;" | Health | ||
! style="vertical-align:middle;" | Experience Reward | ! style="vertical-align:middle;" | Experience Reward | ||
| Line 8: | Line 8: | ||
! style="vertical-align:middle;" | Location | ! style="vertical-align:middle;" | Location | ||
|- | |- | ||
| style="vertical-align:middle; color:#E69710;" | [[File: | | style="vertical-align:middle; color:#E69710;" | [[File:Frosty Grandmaster Zilchus.gif]] | ||
| style="vertical-align:middle; color:#C1C1C1;" | | | style="vertical-align:middle; color:#C1C1C1;" | 200,000 | ||
| style="vertical-align:middle; color:#C1C1C1;" | | | style="vertical-align:middle; color:#C1C1C1;" | 300,000 | ||
| style="vertical-align:middle; color:#C1C1C1;" | | | style="vertical-align:middle; color:#C1C1C1;" | | ||
| style="vertical-align:middle; color:#C1C1C1;" | | - 110 level</br> | ||
| style="vertical-align:middle; color:#C1C1C1;" | [[ | - [[Coldwind Access Quest]]</br> | ||
- [[Crystalline Sword Quest]] | |||
| style="vertical-align:middle; color:#C1C1C1;" | [[File:Crystal of Balance.png]] [[Crystal of Balance]] [[File:Enduring Backpack.png]] [[Enduring Backpack]] [[File:Ice Rapier.png]] 0-4 [[Ice Rapier]] [[File:Stone Skin Amulet.png]] [[Stone Skin Amulet]] [[File:Crystal Coin.png]] 0-5 [[Crystal Coin]] [[File:Small Sapphire.png]] 0-100 [[Small Sapphire]] [[File:Dracoyle Statue.png]] [[Dracoyle Statue]] [[File:Steel Boots.png]] [[Steel Boots]] [[File:Elven Amulet.png]] [[Elven Amulet]] [[File:Time Ring.png]] [[Time Ring]] [[File:Stealth Ring.png]] [[Stealth Ring]] [[File:Icy Rainbow Shield.png]] [[Icy Rainbow Shield]] [[File:Shockbolt Crossbow.png]] [[Shockbolt Crossbow]] [[File:Magic Plate Armor.png]] [[Magic Plate Armor]] [[File:Boots of Haste.png]] [[Boots of Haste]] [[File:Energy Skin Amulet.png]] [[Energy Skin Amulet]] [[File:Stormbreaker.png]] [[Stormbreaker]] [[File:Runic Robe.png]] [[Runic Robe]] [[File:Guardian Boots.png]] [[Guardian Boots]] [[File:Grandmaster's Helmet.png]] [[Grandmaster's Helmet]] [[File:Grandmaster's Legs.png]] [[Grandmaster's Legs]] | |||
| style="vertical-align:middle; color:#C1C1C1;" | [[Coldwind]] | |||
|} | |} | ||
*This daily boss requires <b> | |||
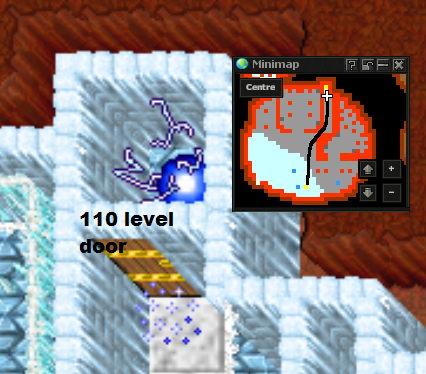
*This daily boss requires <b>110 level</b> and 8 people. | |||
*This daily boss can be done once per server save. | *This daily boss can be done once per server save. | ||
*You have 3 minutes to take reward, otherwise you will be kicked and lose reward. | *You have 3 minutes to take reward, otherwise you will be kicked and lose reward. | ||
* | *Experience from a boss is divided among all the people who deal damage to it. | ||
*In addition, you can do the [[The Grandmaster Quest]] once. | |||
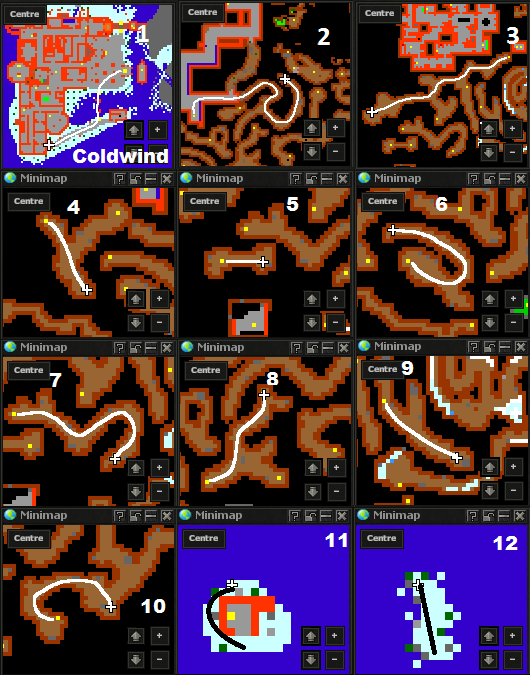
*Follow the map below for the way to switch(entrance). | *Follow the map below for the way to switch(entrance). | ||
---- | |||
1. Start from [[Coldwind]] and follow the map: | |||
[[File:The Grandmaster Quest.png]] | |||
---- | |||
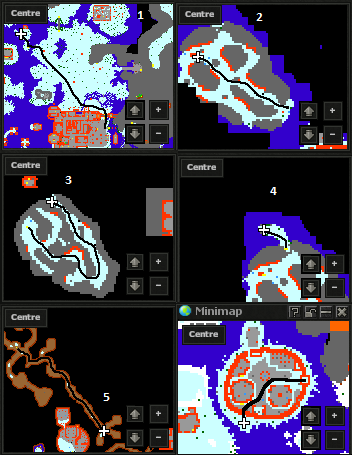
2. Pull the lever, go back to [[Coldwind]] and follow the map: | |||
[[File:The Grandmaster Quest2.png]] | |||
[[File:The Grandmaster Quest3.png]] | |||
---- | |||
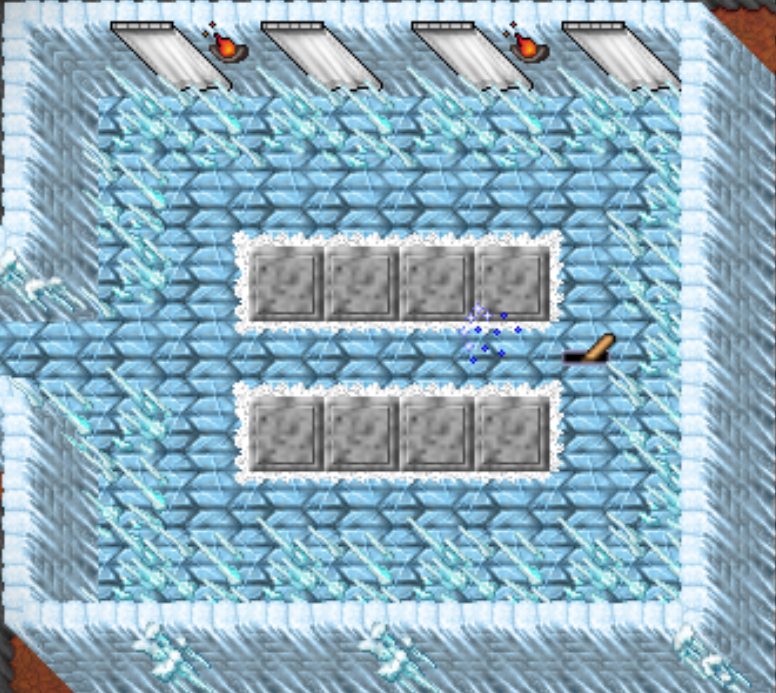
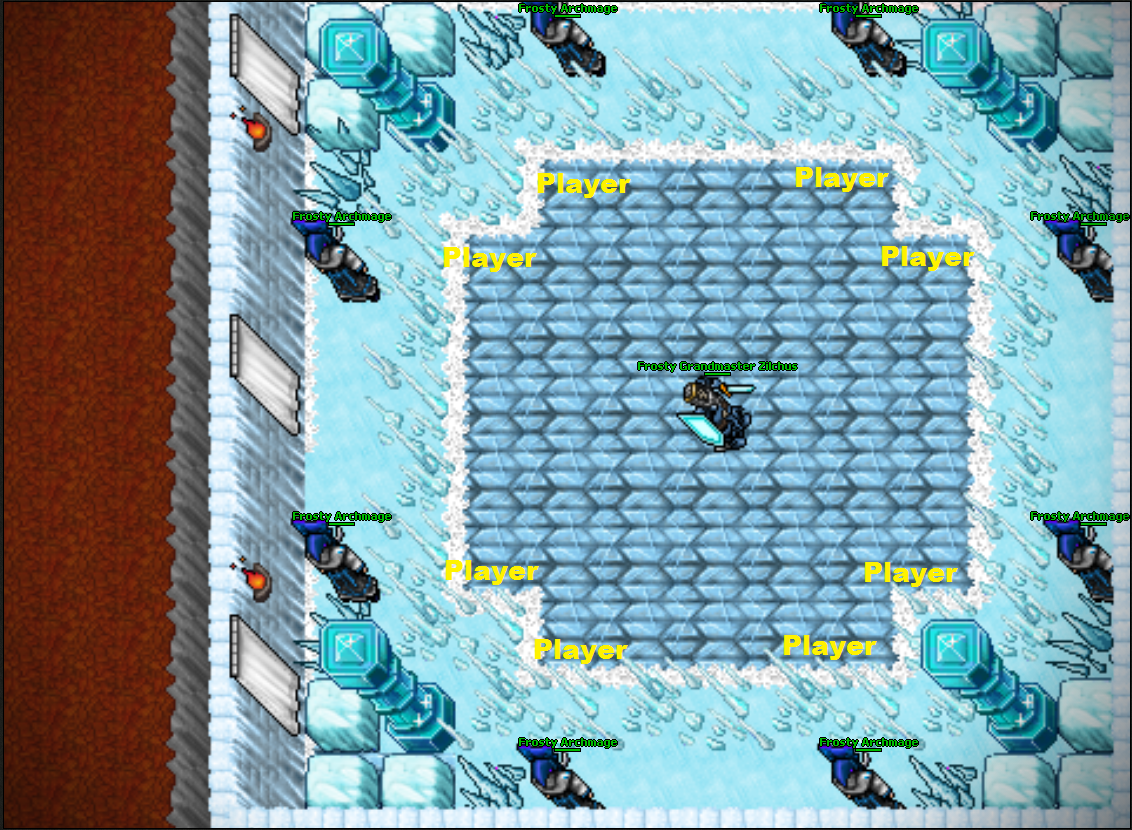
3. Now go to teleport room pull the lever with 8 players and kill the [[Frosty Grandmaster Zilchus]]. The best technique is to mwall out [[Frosty Archmage]]s. | |||
[[File:The Grandmaster Quest4.png]] | |||
[[File:The Grandmaster Quest5.png]] | |||
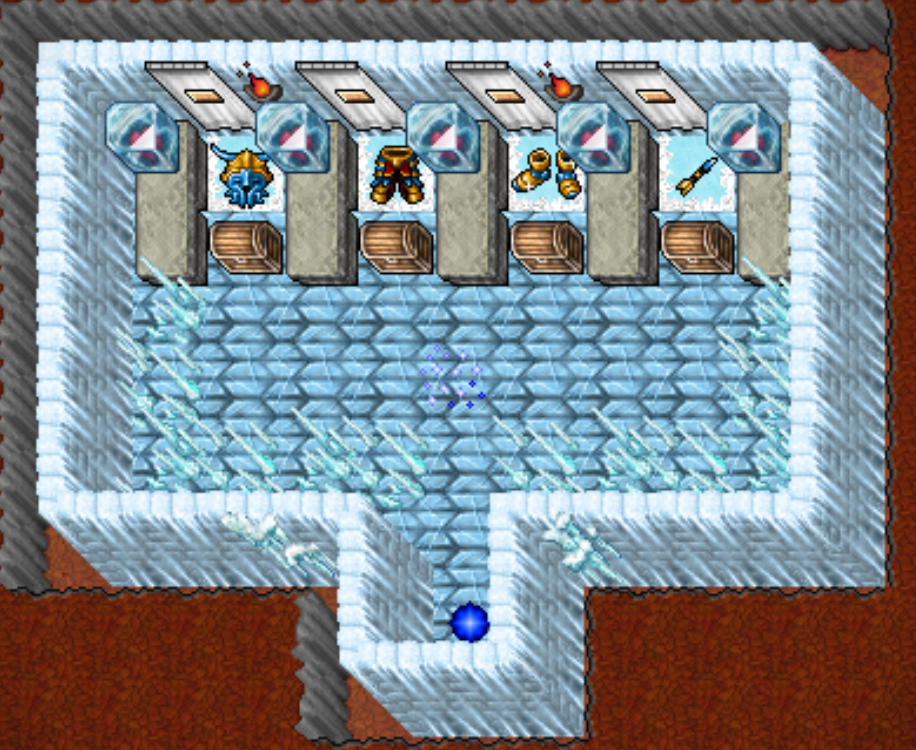
*Also you can find a [[The Grandmaster Quest]] there. | |||
[[File:The Grandmaster Quest6.png]] | |||
Latest revision as of 13:44, 23 January 2025
| Frosty Grandmaster Zilchus | Health | Experience Reward | Requirements | Items | Location |
|---|---|---|---|---|---|

|
200,000 | 300,000 |
- 110 level |
Coldwind |
- This daily boss requires 110 level and 8 people.
- This daily boss can be done once per server save.
- You have 3 minutes to take reward, otherwise you will be kicked and lose reward.
- Experience from a boss is divided among all the people who deal damage to it.
- In addition, you can do the The Grandmaster Quest once.
- Follow the map below for the way to switch(entrance).
1. Start from Coldwind and follow the map:
2. Pull the lever, go back to Coldwind and follow the map:
3. Now go to teleport room pull the lever with 8 players and kill the Frosty Grandmaster Zilchus. The best technique is to mwall out Frosty Archmages.
- Also you can find a The Grandmaster Quest there.
