Archangel Marcus Boss: Difference between revisions
No edit summary |
No edit summary |
||
| (24 intermediate revisions by the same user not shown) | |||
| Line 1: | Line 1: | ||
{| class="wikitable" style="text-align:center; background-color:#4C4C4C; color:#E69710;" | {| class="wikitable" style="text-align:center; background-color:#4C4C4C; color:#E69710;" | ||
|- style="font-weight:bold; vertical-align:middle; background-color:#595959; color:#C1C1C1;" | |- style="font-weight:bold; vertical-align:middle; background-color:#595959; color:#C1C1C1;" | ||
! style="vertical-align:middle;" | [[ | ! style="vertical-align:middle;" | [[Archangel Marcus]] | ||
! style="vertical-align:middle;" | Health | ! style="vertical-align:middle;" | Health | ||
! style="vertical-align:middle;" | Experience Reward | ! style="vertical-align:middle;" | Experience Reward | ||
! style="vertical-align:middle; width:155px;" | Requirements | ! style="vertical-align:middle; width:155px;" | Requirements | ||
! style="vertical-align:middle;" | Items | ! style="vertical-align:middle;" | Items | ||
! style="vertical-align:middle;" | Location | ! style="vertical-align:middle; width:105px;" | Location | ||
|- | |- | ||
| style="vertical-align:middle; color:#E69710;" | [[File: | | style="vertical-align:middle; color:#E69710;" | [[File:Archangel Marcus.gif]] | ||
| style="vertical-align:middle; color:#C1C1C1;" | | | style="vertical-align:middle; color:#C1C1C1;" | 25,000 | ||
| style="vertical-align:middle; color:#C1C1C1;" | | | style="vertical-align:middle; color:#C1C1C1;" | 194,080 | ||
| style="vertical-align:middle; color:#C1C1C1;" | | | style="vertical-align:middle; color:#C1C1C1;" | - 100 level</br> | ||
| style="vertical-align:middle; color:#C1C1C1;" | | - [[Tortoise Quest]]</br> | ||
| style="vertical-align:middle; color:#C1C1C1;" | [[ | - [[Castle Dungeon Quest]]</br> | ||
| style="vertical-align:middle; color:#C1C1C1;" | | |||
[[File:Crystal Coin.png]] 1-4 [[Crystal Coin]] | |||
[[File:Small Amethyst.png]] 1-10 [[Small Amethyst]] | |||
[[File:Small Ruby.png]] 1-15 [[Small Ruby]] | |||
[[File:Black Pearl.png]] 1-8 [[Black Pearl]] | |||
[[File:White Pearl.png]] 1-10 [[White Pearl]] | |||
[[File:Piggy Bank.png]] [[Piggy Bank]] | |||
[[File:Gold Ring.png]] [[Gold Ring]] | |||
[[File:Platinum Amulet.png]] [[Platinum Amulet]] | |||
[[File:Ring of The Sky.png]] [[Ring of The Sky]] | |||
[[File:Crown.png]] [[Crown]] | |||
[[File:Yellow Gem.png]] [[Yellow Gem]] | |||
[[File:Boots of Haste.png]] [[Boots of Haste]] | |||
[[File:Crown Armor.png]] [[Crown Armor]] | |||
[[File:Eagle Shield.png]] [[Eagle Shield]] | |||
[[File:Blue Robe.png]] [[Blue Robe]] | |||
[[File:Heartseeker Blade.png]] [[Heartseeker Blade]] | |||
[[File:Enchanted Robe.png]] [[Enchanted Robe]] | |||
[[File:Archangel Wand.png]] [[Archangel Wand]] | |||
[[File:Backpack of Heaven.png]] [[Backpack of Heaven]] | |||
[[File:Angelic Ring.png]] [[Angelic Ring]] | |||
[[File:Angelic Amulet.png]] [[Angelic Amulet]] | |||
[[File:Angel Bow.png]] [[Angel Bow]] | |||
[[File:Angel Spellbook.png]] [[Angel Spellbook]] | |||
[[File:Helmet of Angel Spirit.png]] [[Helmet of Angel Spirit]] | |||
[[File:Angel Greaves.png]] [[Angel Greaves]] | |||
[[File:Angel Boots.png]] [[Angel Boots]] | |||
[[File:The Angel Doll.png]] [[The Angel Doll]] | |||
| style="vertical-align:middle; color:#C1C1C1;" | [[Edron]] - [[The Castle]] | |||
|} | |} | ||
*This daily boss requires atleast 1 and max 4 | *This daily boss requires <b>100 level</b> and atleast 1 and max 4 people. | ||
*This daily boss can be done once per server save. | *This daily boss can be done once per server save. | ||
*You have 3 minutes to take reward, otherwise you will be kicked and lose reward. | *You have 3 minutes to take reward, otherwise you will be kicked and lose reward. | ||
*You need [[Golden Account]] in order to enter the Boss. | *You need [[Golden Account]] in order to enter the Boss. | ||
*Follow the map below for the way to switch(entrance). | |||
---- | |||
1). We begin by completing the quest [[Castle Dungeon Quest]], then we proceed next floor via the stairs following the maps below." | |||
[[File:Archangel Marcus Boss3.png]] | |||
[[File:Archangel Marcus Boss4.png]] | |||
---- | |||
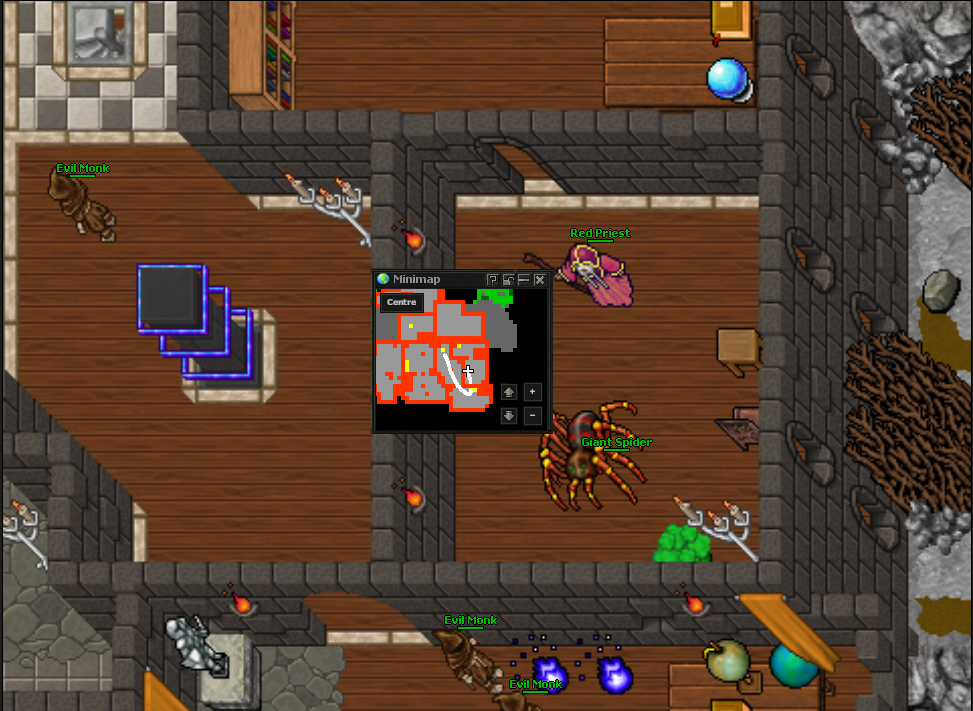
2). Kill the [[Red Priest]] and follow the map to third boss. | |||
[[File:Archangel Marcus Boss5.png]] | |||
---- | |||
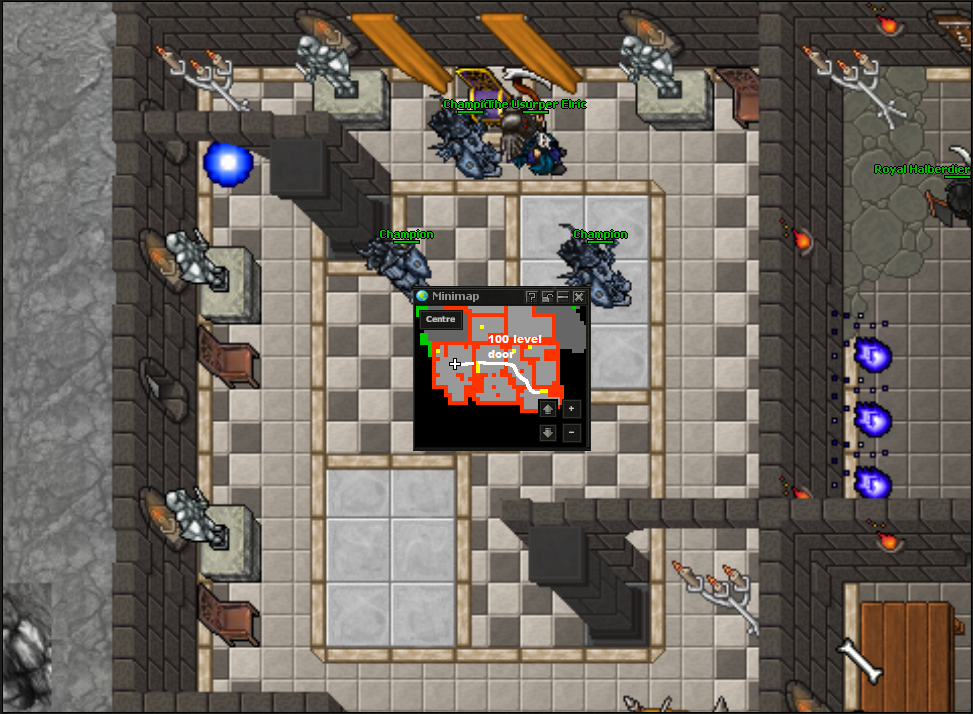
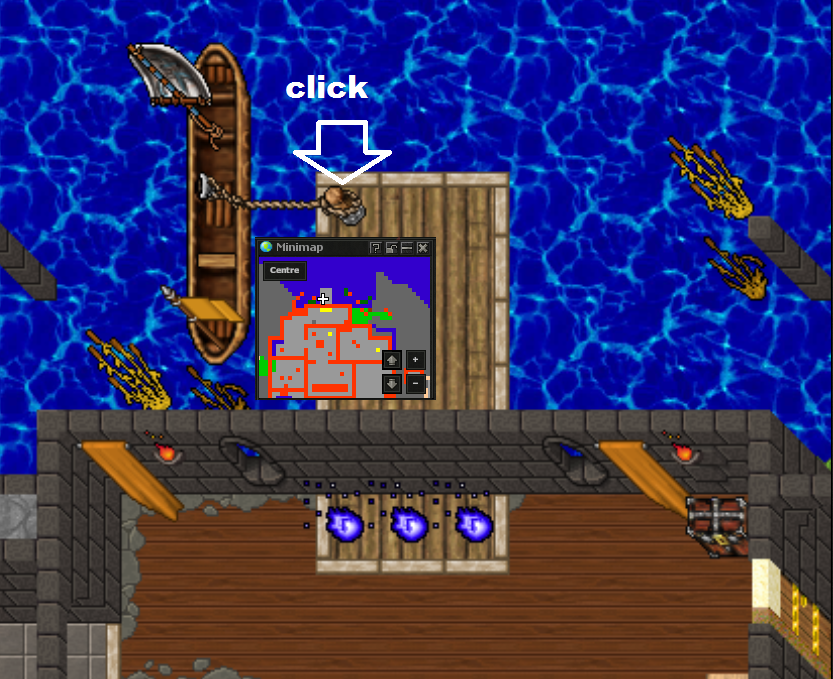
3). Kill the [[The Usurper Elric]], back to main floor 0 of this castle and follow the map. | |||
[[File:Archangel Marcus Boss6.png]] | |||
[[File:Archangel Marcus Boss7.png]] | |||
[[File:Archangel Marcus Boss8.png]] | |||
---- | |||
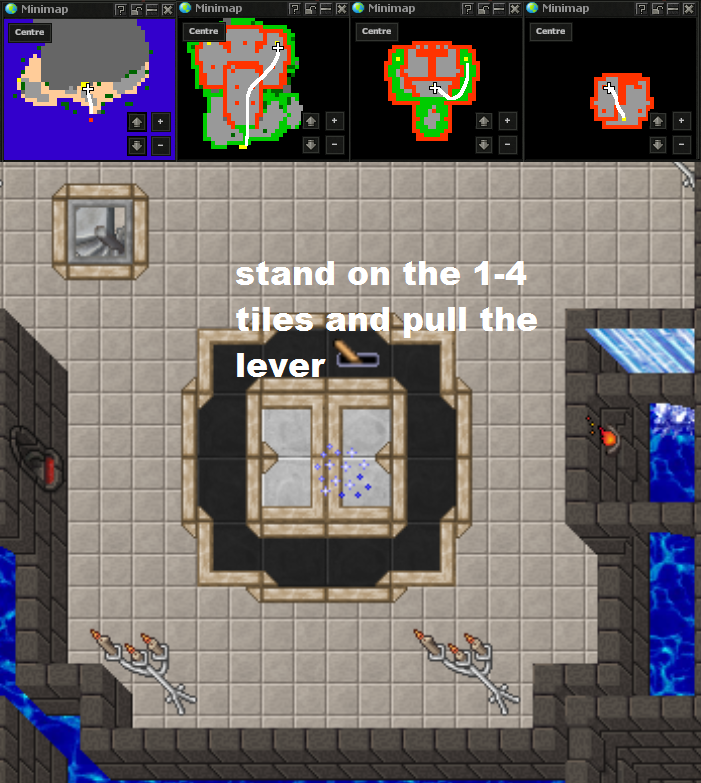
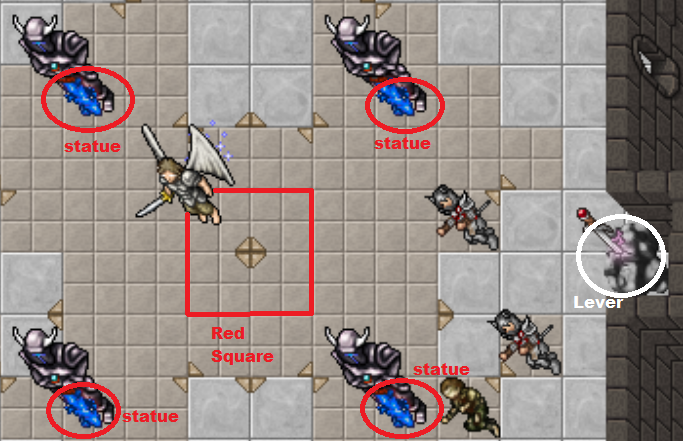
4). The mechanics to kill the Angel is simple, you need to destroy his 4 immunities: (fire, energy, poison, physical). | |||
*In order to do this you need to lure it on one of the 4 squares (red quare), set the statuettes on a given color corresponding to the given immunity such as blue and use the lever marked in white so the boss will lose resistance to energy. | |||
*Do the same with other immunities once you destroy 3 (fire, energy, poison) the boss will automatically lose resistance to physical attacks. | |||
Latest revision as of 20:04, 9 January 2025
| Archangel Marcus | Health | Experience Reward | Requirements | Items | Location |
|---|---|---|---|---|---|

|
25,000 | 194,080 | - 100 level |
|
Edron - The Castle |
- This daily boss requires 100 level and atleast 1 and max 4 people.
- This daily boss can be done once per server save.
- You have 3 minutes to take reward, otherwise you will be kicked and lose reward.
- You need Golden Account in order to enter the Boss.
- Follow the map below for the way to switch(entrance).
1). We begin by completing the quest Castle Dungeon Quest, then we proceed next floor via the stairs following the maps below."
2). Kill the Red Priest and follow the map to third boss.
3). Kill the The Usurper Elric, back to main floor 0 of this castle and follow the map.
4). The mechanics to kill the Angel is simple, you need to destroy his 4 immunities: (fire, energy, poison, physical).
- In order to do this you need to lure it on one of the 4 squares (red quare), set the statuettes on a given color corresponding to the given immunity such as blue and use the lever marked in white so the boss will lose resistance to energy.
- Do the same with other immunities once you destroy 3 (fire, energy, poison) the boss will automatically lose resistance to physical attacks.

