Malzahar Boss: Difference between revisions
From Realesta Wiki
No edit summary |
No edit summary |
||
| (3 intermediate revisions by the same user not shown) | |||
| Line 14: | Line 14: | ||
| style="vertical-align:middle; color:#C1C1C1;" | | | style="vertical-align:middle; color:#C1C1C1;" | | ||
[[File:Platinum Coin.png]] 8-30 [[Platinum Coin]] | [[File:Platinum Coin.png]] 8-30 [[Platinum Coin]] | ||
[[Small Sapphire.png]] 5-10 [[Small Sapphire]] | [[File:Small Sapphire.png]] 5-10 [[Small Sapphire]] | ||
[[Small Emerald.png]] 5-10 [[Small Emerald]] | [[File:Small Emerald.png]] 5-10 [[Small Emerald]] | ||
[[Small Ruby.png]] 1-3 [[Small Ruby]] | [[File:Small Ruby.png]] 1-3 [[Small Ruby]] | ||
[[Ultimate Healing Rune.png]] [[Ultimate Healing Rune]] | [[File:Ultimate Healing Rune.png]] [[Ultimate Healing Rune]] | ||
[[Bronzed Vest.png]] [[Bronzed Vest]] | [[File:Bronzed Vest.png]] [[Bronzed Vest]] | ||
[[Dark Lord's Cape.png]] [[Dark Lord's Cape]] | [[File:Dark Lord's Cape.png]] [[Dark Lord's Cape]] | ||
[[Griffin Shield.png]] [[Griffin Shield | [[File:Griffin Shield.png]] [[Griffin Shield]] | ||
[[Shield of The Beast.png]] [[Shield of The Beast]] | [[File:Shield of The Beast.png]] [[Shield of The Beast]] | ||
[[Phoenix Shield.png]] [[Phoenix Shield]] | [[File:Phoenix Shield.png]] [[Phoenix Shield]] | ||
[[Crusader Helmet.png]] [[Crusader Helmet]] | [[File:Crusader Helmet.png]] [[Crusader Helmet]] | ||
[[Hat of The Mad.png]] [[Hat of The Mad]] | [[File:Hat of The Mad.png]] [[Hat of The Mad]] | ||
[[Strange Helmet.png]] [[Strange Helmet]] | [[File:Strange Helmet.png]] [[Strange Helmet]] | ||
[[Plate Legs.png]] [[Plate Legs]] | [[File:Plate Legs.png]] [[Plate Legs]] | ||
[[ | [[File:Blue Legs.png]] [[Blue Legs]] | ||
[[Beastslayer Axe.png]] [[Beastslayer Axe]] | [[File:Beastslayer Axe.png]] [[Beastslayer Axe]] | ||
[[Skull Staff.png]] [[Skull Staff]] | [[File:Skull Staff.png]] [[Skull Staff]] | ||
[[Serpent Sword.png]] [[Serpent Sword]] | [[File:Serpent Sword.png]] [[Serpent Sword]] | ||
[[Blue Spell Wand.png]] [[Blue Spell Wand]] | [[File:Blue Spell Wand.png]] [[Blue Spell Wand]] | ||
[[Stealth Ring.png]] [[Stealth Ring]] | [[File:Stealth Ring.png]] [[Stealth Ring]] | ||
[[Life Ring.png]] [[Life Ring]] | [[File:Life Ring.png]] [[Life Ring]] | ||
[[Winged Backpack.png]] [[Winged Backpack]] | [[File:Winged Backpack.png]] [[Winged Backpack]] | ||
| style="vertical-align:middle; color:#C1C1C1;" | [[Yarant]] | | style="vertical-align:middle; color:#C1C1C1;" | [[Yarant]] | ||
|} | |} | ||
| Line 43: | Line 43: | ||
*You need [[Golden Account]] in order to enter the Boss. | *You need [[Golden Account]] in order to enter the Boss. | ||
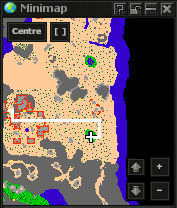
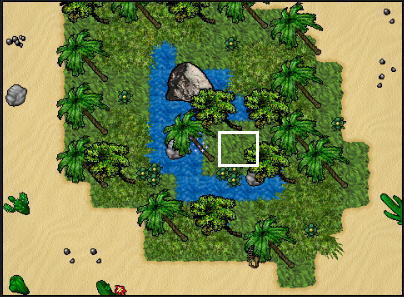
*Follow the map below for the way to switch(entrance). | *Follow the map below for the way to switch(entrance). | ||
To get to the desert with the oasis where the boss are, we use the beginning of the maps from this [[Rook Da Vinci Quest]]. | |||
When we are on [[Yarant]] in the desert we head for the lower oasis: | |||
[[File:Malzahar Boss1.png]] | |||
[[File:Malzahar Boss2.png]] | |||
[[File:Malzahar Boss.png]] | [[File:Malzahar Boss.png]] | ||
Latest revision as of 13:18, 24 February 2025
| Malzahar | Health | Experience Reward | Requirements | Items | Location |
|---|---|---|---|---|---|

|
3,500 | 4,000 | - 40 level |
|
Yarant |
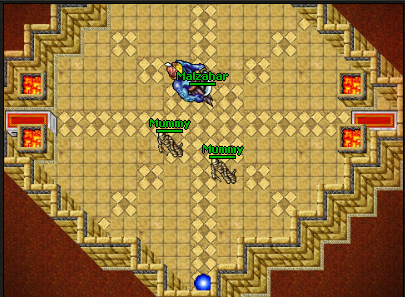
- This daily boss requires 40 level and atleast 1 and max 4 people.
- This daily boss can be done once per server save.
- You have 3 minutes to take reward, otherwise you will be kicked and lose reward.
- You need Golden Account in order to enter the Boss.
- Follow the map below for the way to switch(entrance).
To get to the desert with the oasis where the boss are, we use the beginning of the maps from this Rook Da Vinci Quest.
When we are on Yarant in the desert we head for the lower oasis:


