Dark Descent Quest: Difference between revisions
No edit summary |
No edit summary |
||
| (6 intermediate revisions by the same user not shown) | |||
| Line 1: | Line 1: | ||
<b>Name:</b> [[ | <b>Name:</b> [[Dark Descent Quest]].</br> | ||
<b>Location:</b> [[Rookgaard]].</br> | <b>Location:</b> [[Rookgaard]].</br> | ||
<b>Reward:</b> [[Stealth Ring]]. [[Energy Ring]], 10 [[Platinum Coins]], [[Dragon Necklace]].<br> | <b>Reward:</b> [[Remove Field]] (adito min grav) spell learning, [[Stealth Ring]]. [[Energy Ring]], 10 [[Platinum Coins]], [[Dragon Necklace]].<br> | ||
<b>Monsters:</b> [[Larva]], [[Skeleton]], [[Seeker]], [[Scorpion]], [[Mummy]], [[Scarab]], [[Ghoul]], [[Crypt Shambler]], [[Necromancer]].</br> | <b>Monsters:</b> [[Larva]], [[Skeleton]], [[Seeker]], [[Scorpion]], [[Mummy]], [[Scarab]], [[Ghoul]], [[Crypt Shambler]], [[Necromancer]].</br> | ||
| Line 7: | Line 7: | ||
<span style="font-size:140%;"><b>Requirements:</b></span></br> | <span style="font-size:140%;"><b>Requirements:</b></span></br> | ||
*Level 50. | *Level 50. | ||
*[[Minor | *[[Minor Annihilator Quest]].<br> | ||
*[[File:Golden Pick.png]] [[Golden Pick]]<br> | *[[File:Golden Pick.png]] [[Golden Pick]]<br> | ||
*[[File:Shovel.png]] [[Shovel | *[[File:Shovel.png]] [[Shovel]]<br> | ||
*[[File:Rope.png]] [[Rope]]<br> | *[[File:Rope.png]] [[Rope]]<br> | ||
*[[File:Antidote Rune.png]] [[Antidote Rune]]<br> | *[[File:Antidote Rune.png]] [[Antidote Rune]]<br> | ||
| Line 15: | Line 15: | ||
*[[File:Bow.png]] [[Bow]]<br> | *[[File:Bow.png]] [[Bow]]<br> | ||
*[[File:Arrow.png]] [[Arrow]]<br> | *[[File:Arrow.png]] [[Arrow]]<br> | ||
*[[File: | *[[File:Closed Trap.png]] [[Closed Trap]].<br> | ||
---- | |||
1) To get to the tomb, we do not need a golden pick, we can go down and kill monsters, explore.<br> | 1) To get to the tomb, we do not need a golden pick, we can go down and kill monsters, explore.<br> | ||
| Line 22: | Line 24: | ||
[[File: Necromancer1.png]] | [[File: Necromancer1.png]] | ||
---- | |||
2) Being inside the tomb, we move along the path shown in the pictures, be careful, we will encounter the invisible [[Seeker]] monster, as well as [[Skeleton]]s, [[Scarab]]s and [[Larva]]s, among others. | 2) Being inside the tomb, we move along the path shown in the pictures, be careful, we will encounter the invisible [[Seeker]] monster, as well as [[Skeleton]]s, [[Scarab]]s and [[Larva]]s, among others. | ||
| Line 28: | Line 32: | ||
[[File: Necromancer3.png]] | [[File: Necromancer3.png]] | ||
[[File: Necromancer4.png]] | [[File: Necromancer4.png]] | ||
---- | |||
3) Be sure you've dealt with the monsters, as 2 walls await, both of which can be destroyed, using the [[Golden Pick]]. You choose which one. Then dig a hole, also using [[Golden Pick]], marked with a green square, and go down. | 3) Be sure you've dealt with the monsters, as 2 walls await, both of which can be destroyed, using the [[Golden Pick]]. You choose which one. Then dig a hole, also using [[Golden Pick]], marked with a green square, and go down. | ||
| Line 33: | Line 39: | ||
[[File: Necromancer5.png]] | [[File: Necromancer5.png]] | ||
[[File: Necromancer6.png]] | [[File: Necromancer6.png]] | ||
---- | |||
4) We appear at the bottom, where several [[Crypt Shambler]], [[Skeleton]] and in the corners [[Seeker]] are waiting for us. We see a gate to level 50, go through it. | 4) We appear at the bottom, where several [[Crypt Shambler]], [[Skeleton]] and in the corners [[Seeker]] are waiting for us. We see a gate to level 50, go through it. | ||
| Line 38: | Line 46: | ||
[[File: Necromancer7.png]] | [[File: Necromancer7.png]] | ||
[[File: Necromancer8.png]] | [[File: Necromancer8.png]] | ||
---- | |||
5) Bravo! We have access to [[Necromancer]] on Rookgaard. He's one of the most powerful underworld kings on the [[Rookgaard]], not surprising since you can get such items as [[Skull Staff]], [[Boots of Haste]], [[Clerical Mace]] from him. As long as you don't have magic runes and bows, you won't defeat him, at least solo. See for yourself! | 5) Bravo! We have access to [[Necromancer]] on Rookgaard. He's one of the most powerful underworld kings on the [[Rookgaard]], not surprising since you can get such items as [[Skull Staff]], [[Boots of Haste]], [[Clerical Mace]] from him. As long as you don't have magic runes and bows, you won't defeat him, at least solo. See for yourself! | ||
[[File: Necromancer9.png]] | [[File: Necromancer9.png]] | ||
---- | |||
6) BONUS! DESTROY FIELD SPELL QUEST! (Level 30 required)<br> | 6) BONUS! DESTROY FIELD SPELL QUEST! (Level 30 required)<br> | ||
Latest revision as of 14:57, 16 January 2025
Name: Dark Descent Quest.
Location: Rookgaard.
Reward: Remove Field (adito min grav) spell learning, Stealth Ring. Energy Ring, 10 Platinum Coins, Dragon Necklace.
Monsters: Larva, Skeleton, Seeker, Scorpion, Mummy, Scarab, Ghoul, Crypt Shambler, Necromancer.
Spoiler:
Requirements:
- Level 50.
- Minor Annihilator Quest.
 Golden Pick
 Shovel
 Rope
Rope Antidote Rune
 Life Fluid
 Bow
Bow Arrow
Arrow Closed Trap.
1) To get to the tomb, we do not need a golden pick, we can go down and kill monsters, explore.
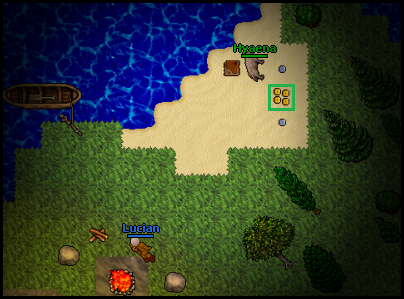
Let's get started! We go to the sand jetty, near Lucian, the route was shown in the Minor Annhilator Quest (across the northern bridge and northwest to the patch of sand.
When you arrive, start digging using the Shovel, at the spot marked with 4 Gold Coins and a green square. It may take us up to 2 minutes, be patient.
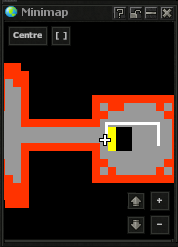
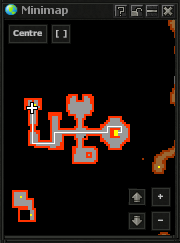
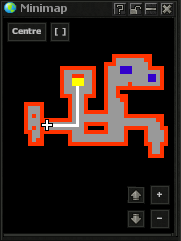
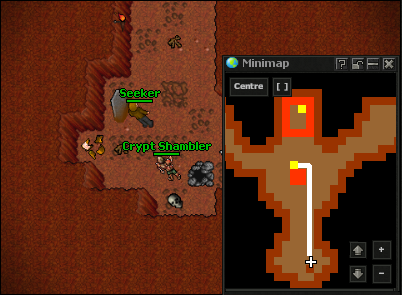
2) Being inside the tomb, we move along the path shown in the pictures, be careful, we will encounter the invisible Seeker monster, as well as Skeletons, Scarabs and Larvas, among others.
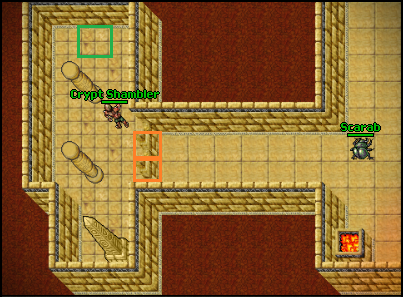
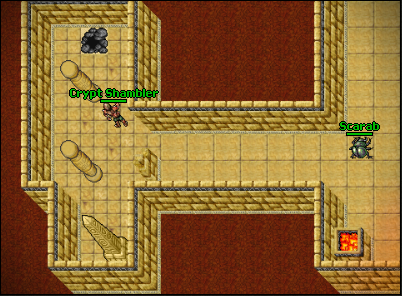
3) Be sure you've dealt with the monsters, as 2 walls await, both of which can be destroyed, using the Golden Pick. You choose which one. Then dig a hole, also using Golden Pick, marked with a green square, and go down.
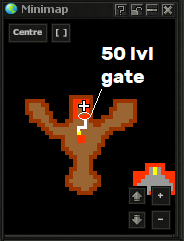
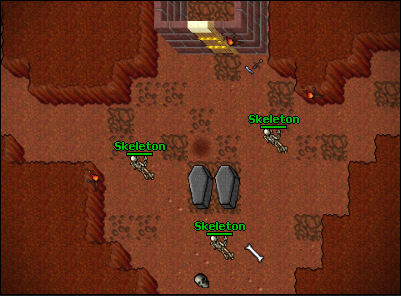
4) We appear at the bottom, where several Crypt Shambler, Skeleton and in the corners Seeker are waiting for us. We see a gate to level 50, go through it.
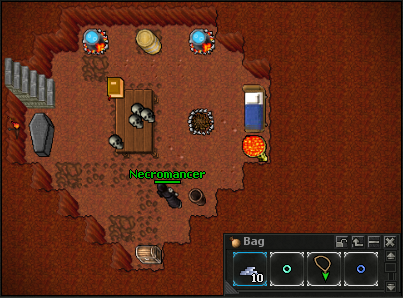
5) Bravo! We have access to Necromancer on Rookgaard. He's one of the most powerful underworld kings on the Rookgaard, not surprising since you can get such items as Skull Staff, Boots of Haste, Clerical Mace from him. As long as you don't have magic runes and bows, you won't defeat him, at least solo. See for yourself!
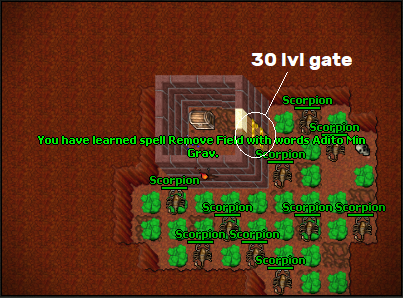
6) BONUS! DESTROY FIELD SPELL QUEST! (Level 30 required)
Head south of the gate with Necromancer and dig the hole shown in the photo, then go down and take the fight to the entire Scorpion generation. There is a spell waiting for us in the box, which will allow us to create Destroy Field Rune ourselves.
Goodluck!
