The Devils Quest: Difference between revisions
No edit summary |
No edit summary |
||
| (5 intermediate revisions by the same user not shown) | |||
| Line 39: | Line 39: | ||
| style="vertical-align:middle; background-color:#4C4C4C; font-weight:normal; color: yellow;" | Help | | style="vertical-align:middle; background-color:#4C4C4C; font-weight:normal; color: yellow;" | Help | ||
|- | |- | ||
| style="font-weight: normal;" | [[Tipsy Hunter]: | | style="font-weight: normal;" | [[Tipsy Hunter]]: | ||
| style="vertical-align:middle; background-color:#4C4C4C; font-weight:normal;" | Help? Oh, you're too kind, my friend! Let me tell you something, I have a little challenge for you *Hicks* ... | | style="vertical-align:middle; background-color:#4C4C4C; font-weight:normal;" | Help? Oh, you're too kind, my friend! Let me tell you something, I have a little challenge for you *Hicks* ... | ||
|- | |- | ||
| Line 133: | Line 133: | ||
---- | ---- | ||
5) Finally able to extract a deeply hidden secret from him, we have to go to the [[Dragon]] | 5) Finally able to extract a deeply hidden secret from him, we have to go to the [[Dragon]]s location to get further clues. The route and access is described in [[The Dragon Quest]]. | ||
[[File:Devils5.png]] | [[File:Devils5.png]] | ||
| Line 147: | Line 147: | ||
[[File:Devils7.png]] | [[File:Devils7.png]] | ||
[[File:Devils8.png]] | [[File:Devils8.png]] | ||
---- | ---- | ||
8) When we have killed [[Hunter]]s on these sqms and WE DON'T HAVE A [[ | |||
8) When we have killed [[Hunter]]s on these sqms and WE DON'T HAVE A [[Stealth Ring]] on us/in our backpack, we write the following to [[The Huntress]]. | |||
<b>Conversation:</b> | <b>Conversation:</b> | ||
| Line 161: | Line 163: | ||
|- | |- | ||
|} | |} | ||
---- | ---- | ||
9) And we appear at the final stage of the quest. | 9) And we appear at the final stage of the quest. | ||
[[File:Devils9.png]] | [[File:Devils9.png]] | ||
---- | ---- | ||
10) Now focus! We have 3 rooms, in each there are 4 levers. The quest is to find the right combination. It is best to have 3 players, in which each communicating with each other, looking for the correct variation of the 12 levers. | 10) Now focus! We have 3 rooms, in each there are 4 levers. The quest is to find the right combination. It is best to have 3 players, in which each communicating with each other, looking for the correct variation of the 12 levers. | ||
Example: | Example: | ||
Player 1 is in room 1, switches the left-top lever and it lit up red, that means that this lever is not the first one (so it is any number of the other levers, but not the first one). We check the second one - top-right and it lit up green, that means this one is the first one in the correct combination! <b>And so we have to find all 12 green levers one by one.</b> | Player 1 is in room 1, switches the left-top lever and it lit up red, that means that this lever is not the first one (so it is any number of the other levers, but not the first one). We check the second one - top-right and it lit up green, that means this one is the first one in the correct combination! <b>And so we have to find all 12 green levers one by one.</b> | ||
<b>NOTE: Each time a lever turns red, we have to start over, that means, reset the levers! Find all 12 levers that turn green in turn. What does reset mean? It means that when you have reached, for example, the 6 correct green levers, then when you click the next one, looking for the 7th one and it lights up red, we have to reset all the levers and start back from the first green one.</b> | <b>NOTE: Each time a lever turns red, we have to start over, that means, reset the levers! Find all 12 levers that turn green in turn. What does reset mean? It means that when you have reached, for example, the 6 correct green levers, then when you click the next one, looking for the 7th one and it lights up red, we have to reset all the levers and start back from the first green one.</b> | ||
<b>NOTE2: Each lever that turns red has a % chance of spawning a [[Demon Skeleton]] or [[Fire Devil]] ;)</b> | <b>NOTE2: Each lever that turns red has a % chance of spawning a [[Demon Skeleton]] or [[Fire Devil]] ;)</b> | ||
| Line 176: | Line 184: | ||
[[File:Devils11.png]] | [[File:Devils11.png]] | ||
[[File:Devils12.png]] | [[File:Devils12.png]] | ||
---- | ---- | ||
11) Once we manage to solve this quest and find the correct combination of 12 levers, the magic wall will disappear and we can run for the prizes! | 11) Once we manage to solve this quest and find the correct combination of 12 levers, the magic wall will disappear and we can run for the prizes! | ||
[[File:Devils13.png]] | [[File:Devils13.png]] | ||
[[Category: Quests]] | [[Category: Quests]] | ||
Latest revision as of 13:18, 13 January 2025
Name: The Devils Quest.
Location: Rookgaard.
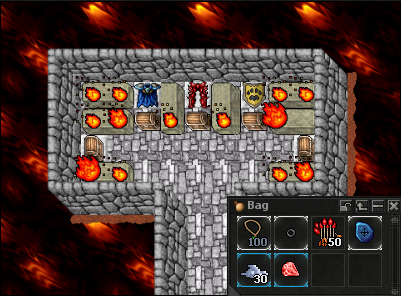
Reward: Optional Shield of The Beast or Lavaforged Legs or Cloak of Brilliance and 50 Burst Arrows, Dragon Necklace, Time Ring, 30 Platinum Coins, Red Gem, 10 Ultimate Healing Rune.
Monsters: Smugglers, Hunters, Demon Skeletons, Fire Devils, Dragon, Demon Skeletons.
Spoiler:
Requirements:
- Level 40, at least 3 players
- Verdia Quest.
 Rope
Rope Ice Cubes 3x
 Vial
Vial Life Fluids.
 Bow
Bow Arrow
Arrow Light Energy Missile Rune
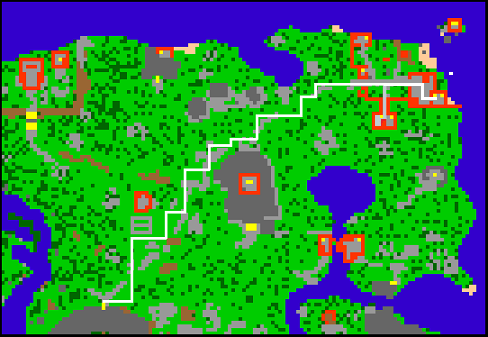
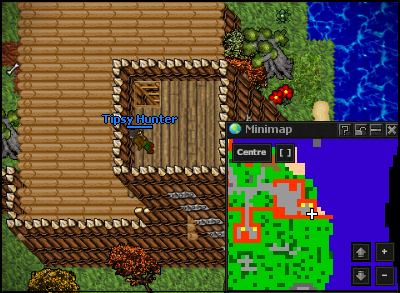
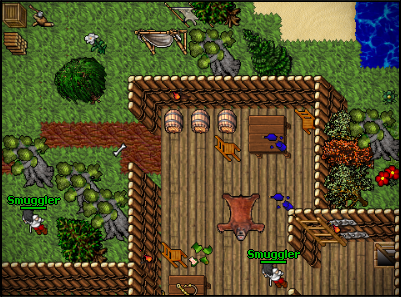
1) This quest start by going to Smugglers headquarters to speak with Tipsy Hunter. The initial path as after the The Holy Tible of the Dark Crypt Quest
2) It turns out that something Tipsy Hunter is mumbling something, so to get along with him, we must be in a similar state. Let's go get a drink!
Note: Remember to take an empty vial with you.
Conversation:
| Player: | Hi |
| Tipsy Hunter: | *Hicks*, what? Oh, hey there, buddy! |
| Player: | Help |
| Tipsy Hunter: | Help? Oh, you're too kind, my friend! Let me tell you something, I have a little challenge for you *Hicks* ... |
| Tipsy Hunter: | Do you want to know what? |
| Player: | Yes |
| Tipsy Hunter: | Bring me three ice cubes, and I'll generously reward you! ... |
| Tipsy Hunter: | Ah, you see, my drink is missing that special something, that cool accent that makes it truly refreshing. Ice cubes are the answer, my friend! ... |
| Tipsy Hunter: | They will transform this average beverage into a masterpiece, will be able to make this favour for me? *Hicks* |
| Player: | Yes |
| Tipsy Hunter: | Perfect! You're a true friend, buddy. Let me think *Hicks* ... |
| Tipsy Hunter: | Ice cubes can be found in a place where it's really cold ... |
| Tipsy Hunter: | I'm not sure how *Hicks* I'll get them for you, but I'll figure it out, will you? |
| Player: | Yes |
| Tipsy Hunter: | Oh, my generous friend! If you bring me those ice cubes, I'll reward you with a secret ... |
| Tipsy Hunter: | A secret that will change your life forever. *Hicks* |
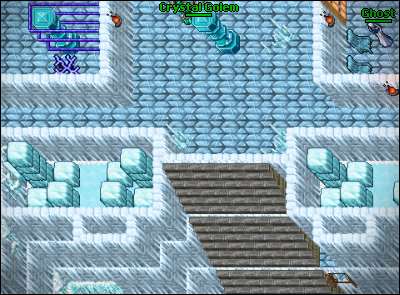
3) Now we have to go to the island that was described in the Iceland Quest and get 3 Ice Cubes from the castle or monsters.
4) When we have captured 3 Ice Cubes, we return to Tipsy Hunter, remember to have a drink before talking to him.
Conversation:
| Player: | Hi |
| Player: | Ice cubes |
| Tipsy Hunter: | Did you brought me those 3 ice cubes? |
| Player: | Yes |
| Tipsy Hunter: | Psst... I have a secret for you. |
| Tipsy Hunter: | Near the dragon's lair, there is a powerful magical book hidden ... |
| Tipsy Hunter: | They say it contains *Hicks* ancient spells and forbidden knowledge ... |
| Tipsy Hunter: | But beware, many have tried to obtain it and met a fiery fate ... |
| Tipsy Hunter: | It is said that the book is hidden *Hicks* in a concealed chamber deep within the dragon's cave ... |
| Tipsy Hunter: | It is guarded by treacherous traps and wild creatures ... |
| Tipsy Hunter: | If you have the courage to face *Hicks* the dragon and find the book, the power within can change your destiny ... |
| Tipsy Hunter: | But remember, one should not underestimate a dragon. Good luck, my friend! |
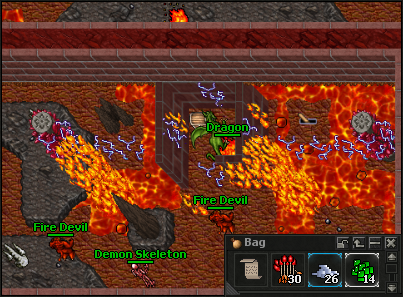
5) Finally able to extract a deeply hidden secret from him, we have to go to the Dragons location to get further clues. The route and access is described in The Dragon Quest.
6) When we manage to get the scroll bans and click the box at Dragon to get permission to proceed to the next stage of the quest, we return to the Smugglers settlement.
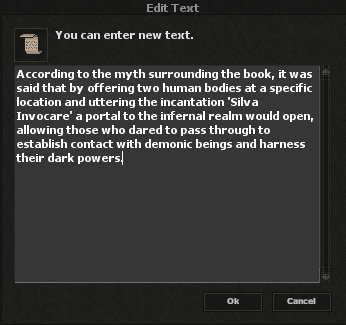
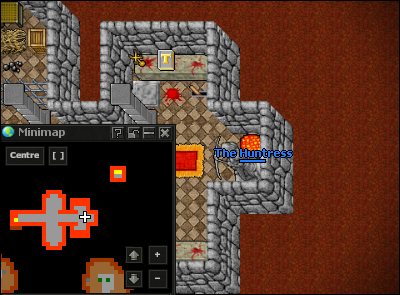
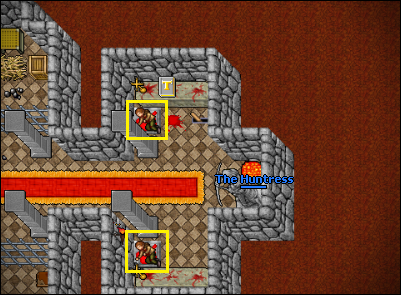
7) We have already learned the spell that needs to be said to start the actual phase of the task. They are 'Silva Invocare'. We head downstairs, where there is a The Holy Tible and 2 Hunters. Now we have to kill 2 Hunters on the designated two sqm, in addition, there must be fresh blood on these 2 SQM. (use empty vial to get blood and pour it out on the SQMs').
8) When we have killed Hunters on these sqms and WE DON'T HAVE A Stealth Ring on us/in our backpack, we write the following to The Huntress.
Conversation:
| Player: | Hi |
| Player: | Silva Invocare |
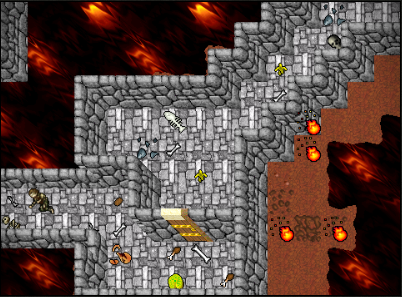
9) And we appear at the final stage of the quest.
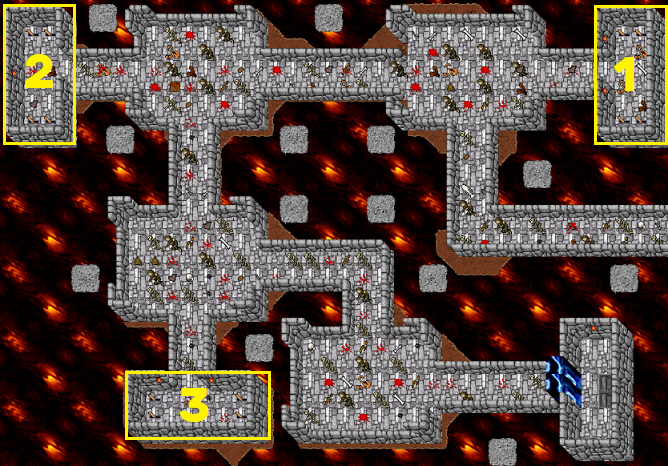
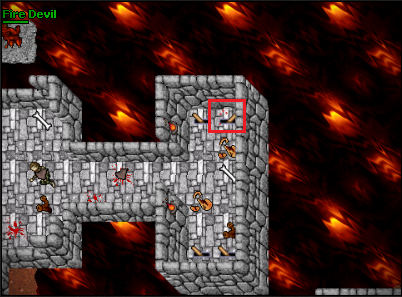
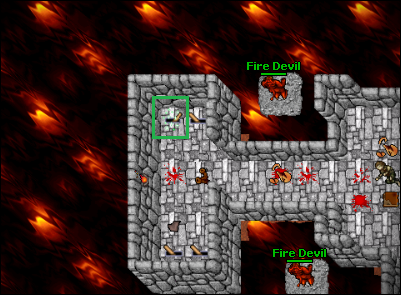
10) Now focus! We have 3 rooms, in each there are 4 levers. The quest is to find the right combination. It is best to have 3 players, in which each communicating with each other, looking for the correct variation of the 12 levers. Example:
Player 1 is in room 1, switches the left-top lever and it lit up red, that means that this lever is not the first one (so it is any number of the other levers, but not the first one). We check the second one - top-right and it lit up green, that means this one is the first one in the correct combination! And so we have to find all 12 green levers one by one.
NOTE: Each time a lever turns red, we have to start over, that means, reset the levers! Find all 12 levers that turn green in turn. What does reset mean? It means that when you have reached, for example, the 6 correct green levers, then when you click the next one, looking for the 7th one and it lights up red, we have to reset all the levers and start back from the first green one.
NOTE2: Each lever that turns red has a % chance of spawning a Demon Skeleton or Fire Devil ;)
11) Once we manage to solve this quest and find the correct combination of 12 levers, the magic wall will disappear and we can run for the prizes!
